Showing posts sorted by relevance for query cakes. Sort by date Show all posts

Sunday, October 30, 2022

Sweet Bakings--A Few Re-peerings

Last month, I blogged about sweet bakings, recipe undertakings spread over 13 years of blogging. Recipes I spotted on the web inspired me to experiment, not merely replicate. i came up with 28 cooky recipes and 19 cake and cake-ish recipes. For cakes, I started out mostly blogging about cupcakes and occasional mini-muffins. For cookies, I varied baking cake mix cookies but also baked scratch cookies.

Maybe surprisingly, I'd done several of the recipes seldom since blogging about them. A few never-agains are because a particular ingredient, usually a cake mix, is either no longer available, formulation is different, or weight is different (mostly less).

Specific to cake mix powder, I'd made cakes AND cake mix cookies over years to remember the standard size weighed 18.25 ounces. Manufacturers reduced the amount to 16.25 for a few years. Now it's 15.25. It's irritating about companies screwing around with powder amounts that, worse than result in smaller finished good(s), make an inferior item. Some recipes WERE perfect with 18.25 ounces of powder.

Cooky Monsterous

With "A Convenient Cake Mix Cooky Batch" (#018), I combined Red Velvet cake mix (especially seasonal for Valentine's Day) and strawberry flavor cake mix. I'd made several batches for a few years for sharing in the workplace. Haven't made them for well over a decade.

I must have been really ambitious or patient when I did Krusteaz Choco Caramel Squares" (#139). Or I might have used a compelling coupon. Anyway, Seems that Krusteaz no longer carries my main recipe ingredient, Krusteaz Molten Deep Dish Chocolate Cookie with Caramel Center.

I noticed that I had omitted "Baking Cookies with Trader Joe Cake MIx" from my cooky recipe list. I can only guess that my results weren't great. In any case, TJ's 28-ounce Golden Yellow cake mix is no longer available. Instead, TJ sells Yellow Cake & Baking Mix, $2.99 for 16 oz. Price is double what I'd consider for name-brands Duncan Hines, Betty Crocker, or Pillsbury. BTW, I often buy my supermarket brand, comparable in quality to the name brands, and a smidge more powder (16.5 oz).

Cakes and Cupcakes and Muffins, Oh, My!

In June 2012, my first cakey recipe was "Lemon Poppyseed Mini-cupcakes" (#070). Not much of a stretch for deviating from a set recipe, but it was a start.

"Square Mini and Whoopie Muffin Experiment" (#88) was an experiment for using up two half-boxes of cake mix (Red Velvet, Strawberry) to try making muffins, and trying out two different pans. Let's just say the experiment was a been-there-done-that experience.

"Mini-cupcake Offload: Pan Type & Prep, Batter Amt" (#118) is another recipe that I made while in muffin mode, specifically mini-muffins. I might be inclined to try layer-caking it at another time. The ingredients sound tasty! The amount of cherry filling, however, sounds maybe more than necessary,. With a few cake experiments under my belt, I might be able to gauge actual amounts to use. Google can also help guide.

In 2016, I moseyed over to something bigger, to be eaten with a fork, then zebra layer cakes. It was another four years before making and documenting a layer. Did another couple more this year. Cakes are a bit more labor intensive than cookies.

I haven't baked muffins or cupcakes in a long while is because of a shifting preference for layer cakes. The longer baking times for such cakes seem to result in more moistness retention. (Cupcakes and muffins have more surface area per batch than two layers of cake.)

I have had an eye on a springform pan cake recipe "Cake in 5 minutes! You will make this cake every day. Few people cook cakes like this!". Thinking that chocolate pudding or blueberry jam in place of the orange filling might be interesting.

Serving Sizes SNit

Related to cake mix manufacturers' weight reduction is supposed number of servings. I distinctly recall that nutrition tables used to state that number of servings was 12. Now it's 10. Imho, it's a lot easier to cut a cake into 12 wedges than 10.

Meandering to barely-related topic--pizza portions. I won't name names, but one big-name pizza manufacturer states that the number of servings is 5. How easy is it to cut a pizza, whether round or square, into FIVE pieces?


Related:
Pt 1 Sweet Bakings--Cookies, Mostly
Pt 2 Sweet Bakings--Cakes, Cupcakes, and Mini-muffins

Friday, January 31, 2025

Raspberry Con-fusion Cake

I wanted to Kool-Aid my cake using Raspberry Kool-Aid, but the supermarket didn't carry that flavor. I thought about using Jello, maybe make a poke cake. Fortunately, I found info for helping integrate raspberry gelatin and cake in a non-pokey way. The result was my raspberry con-fusion cake (details farther down).

No Hokey Pokey Cake for Me, but Something Else

When I read elsewhere that a poke cake would deteriorate in a few days, I abandoned the idea. Besides short life, the recipe looked like more work than I wanted to do. I later thought about making something with raspberry gelatin and cake. Did some poking around supermarket prices and availability. Jello's small size cost nearly as much as the family size. I noticed that the store carries both Royal and Hill Country Fare raspberry sugar-free brands.

I found a few resources to use gelatin in cake besides making poke cakes. Several commenters recommended merely following the cake box's instructions and mixing in the gelatin powder. I've run across info about enhancing cakes by adding an extra egg and using milk instead of water, In my zeal to try a few different details, I put in too much fluid.

My Con-fusion

My con-fusion with this cake resulted from using the amount of fluid called for if making a small gelatin batch. For integration into a cake, I needed to put in only half the fluid. Regular instructions for small-package gelatin calls for 1 cup of boiling water and 1 cup of cold water. Normal box cake recipes call for 1 cup of water total. Sooo, I put too much fluid. I decided to just carry on and see how the cake turned out.

To adjust for too much fluid, I baked the cakes for several minutes longer, hoping evaporation would help. The cake layers baked; the toothpick test came out well. However, they did not rise. The finished cake cut cleanly with no crumbs. The mouth-feel texture was dense, like pound cake. Within the six days of consumption, the cake became more moist, even watery. The frosting seemed to almost liquefy to saucy consistency.

If inclined, Google "what happens if you add too much fluid to cake batter". The next time I retry the recipe, I'll remember to use only half the amount of fluid.)

Update April 29 2025: "Followup Raspberry Cake, Fluid Deconfusion" (article, video)

Resources for Using Gelatin in Cakes (Excluding Pokes)

Calories and Sodium

The calories and sodium differ on whether you use sugar-free or sugared Jello gelatin powders.

Note: Using sugared Jello instead of sugar-free HCF adds about 320 extra calories (~27 C/svg) and 320 extra mg of sodium (~27 mg/svg) to the cake. Between the two sugar-free brands, the amount of calories is negligible. The amount for sodium is more significant. The following abbreviated table compares calories and sodium for HCF, Royal, and Jello raspberry gelatins.


Got cake sweet tooth? Get results for some of my cake blog articles.

Friday, September 30, 2022

Pt 2 Sweet Bakings--Cakes, Cupcakes, and Mini-muffins

I've been blogging since September 2009. I'd started out with text content, later adding images. Over the last few years, I've accompanied articles with slide shows and videos that I've posted to YouTube.

Sweets seem to have piqued me, particularly from early to mid 2010s. This year has re-piqued me. In inventorying my recipe blogs, i came up with 28 cooky recipes and 19 cake and cake-ish recipes. In the cake-centric video, I list my blog catalog number with the article title and finished-item image (newest at top).

In musing about sweets, I'd noticed similarities and differences in topic choice and execution over the years. (For cakes, I started out mostly blogging about cupcakes and occasional mini-muffins.)

Morselly Cakes to Whole Cakes

Amusingly, my interest in cake recipes and documenting them have evolved from earlier times. Early on, most of my cakey topics have been articles with thumbnailish images. I did a few cake items a few years ago, with video. I recently got more involved with making whole cakes and videos for them. I seldom narrate videos anymore.

Some Cake Prep Changes Over Time

My cake pan preparation is now neater. And, after having had my tilt-head mixer, I finally decided to use it for cake batter mixing. The metal bowl's handles make pouring easier than using both hands on a glass mixing bowl.

One recent acquisition I've appreciated is my digital scale. It has five clickable units of measure and reads out to two decimal places. Zeroing out containers is a breeze, and weight readouts are more accurate than my old Braun scale.


Related:
Pt 1 Sweet Bakings--Cookies, Mostly
Sweet Bakings--A Few Re-peerings

Friday, February 28, 2014

Mini-cupcake Offload: Pan Type & Prep, Batter Amt

In case the blog article title seems oddly abbreviated, my intent is to minimize the number of characters but still convey the topic, related to my previous article about offloading fudge. For that experiment, I contrasted spray oil vs. spray oil and powdered sugar for offloading fudge, using mini-cupcake silicone and aluminum pans. That dessert requires no baking, thus, use of powdered sugar for prepping some of the pan cavities.

Initially, my experimentation idea this time was using liner papers for mini-cupcakes after baking them. The first time I tried a mini-cupcake recipe and used a silicone pan, I poured the batter into paper-lined cavities. The paper boundaries, nearly vertical, were more challenging for avoiding spills at edges. The baked cakes were instantly and easily removable. Unfortunately, some cake tend to stick to the papers, lessening the edible amount.

So, this time around, was going to only contrast spray oil vs. spray oil and flour in baking Choco Cherry Choco Chip mini-cupcakes. But then, I also wanted to see how well mini-cupcake paper liners fit the baked cakes if I varied the amount of batter—underfill (level tablespoonful) and common fill (rounded tablespoonful).

I had intended on using only silicone pans, After prepping and one of them and putting it in the oven, it occurred to me that the baking process was going to take a lot longer if I switch out several pans' worth. So, I pulled out the aluminum pans and prepped and filled them also. The second oven batch took aa bit of arranging and rearranging, with the second silicone pan and three aluminum pans. I balanced one metal pan on an oven rack ledge and another pan's edge.

The original recipe I modified for the mini-cupcakes is Cherry Vanilla Chocolate Chip Cake. Lucky Leaf pushed its canned pie filling.

A more elaborate recipe that uses chocolate cake mix is Chocolate Cherry Cake, but the baker uses the chocolate chips for the frosting and none in the cake itself.

An extremely elaborate recipe is from SugarWinzy—Cherry Chocolate Chip Layer Cake. Her one-off recipe for cupcakes is Chocolate Chip Cherry Cupcakes. My eyes glazed over from the number of ingredients and artistry.

The simplest recipe would have been using only one flavor of cake mix, but I wanted my batch to be more like milk chocolate cake. Ingredients from the Lucky Leaf recipe and my deviations:
1 16.25-ounce box white cake mix (I used 1/2 box *each* of chocolate and white cake mixes.)
3 eggs
1 21-ounce can LUCKY LEAF Regular or Premium Cherry Pie Filling (I used a different brand.)
1 cup mini chocolate chips (I used regular size chips.)
Instead of using either a bundt cake or oblong pan, I used the silicone and aluminum mini-cupcake pans, baking at 350 for only about 16 minutes each batch. I also skipped the icing part of the recipe. I considered the cakes (yield of 84) to be sweet enough naked, with less work, fewer ingredients, fewer calories.

The spray-oil only method of prepping the pans resulted in fewer instances of cakes sticking to pans than using both spray oil and flour. Originally, I wondered if the papers might be undersized with the bigger post-baked cakes. I was happy to see that the papers hugged well. Maybe the pleats of the sides help accommodate mini-cupcakes for perimeter and volume. The baking session yielded 84 mini-cupcakes.

Try the "Lemon Poppyseed Mini-cupcakes" recipe. Besides putting in a pixstrip for step-by-step instructions, I also talked about muffin vs. cupcake. Also visit Square Mini and Whoopie Muffin Experiment, the recipe where I contrast square mini-muffins and whoopie muffins for shape.

Saturday, June 24, 2023

Soda Pop Layer Cake--Low-height N Rich, Yum

A few months ago, cost of eggs had nearly doubled the cost of making cake mix cake, not counting cost of frosting. The egg costs have come down, but I haven't quite recovered from the sticker shock. Recently, I made a soda pop layer cake (eggless!). Yum!

My video shows how to make the cake using a box of white cake mix and non-diet lemon lime soda (room temperature), with canned vanilla frosting. (Anything goes for flavors you want to use.) Although loads of such recipes are findable on the web, mine is for making a 9" diameter layer cake. (Just about all the other recipes aim for cupcakes or 9" x 13" sheet cakes.)

The cake turned out lower height than I expected. Noteworthy: The soda pop weighs less than usual-recipe eggs/egg whites, oil and water. Noteworthy: Batter amount is about 3/4 as much as for full-recipe cake.

I had originally run across soda pop cake when I encountered 2-ingredient recipes. At least one was pizza dough. A few were 2-ingredient cakes, several eggless. Some of the cakes called for flax seed, some for yogurt. The eggless, soda-pop cakes intrigued me the most.

Betty Crocker-centric

Betty Crocker's "Learn About Cake Baking with Soda Pop" explains carbonation WRT soda pop and leavenings in baked goods.

The carbon dioxide bubbles in soda pop act as a leavening agent — the element that makes baked goods rise and makes them light and fluffy. ...Kitchen staple leaveners — like baking soda and baking powder — use a chemical reaction to create carbon dioxide bubbles.

"Cake Baking with Soda Pop" is eye-opening for calling for 1) only one cupcake pan and for 2) the mixing time using an electric mixer. View the video there or on YouTube.

beat (1) dry cake mix and (1) soda pop with an electric mixer on low speed for 1 minute. Scrape the side of the bowl, then mix on a medium speed for 2 minutes.

Oddly, the Betty Crocker "Two-Ingredient Soda Pop Cupcakes" says "24 regular-size muffin cups". FWIW, this recipe specifies 16.25 oz for cake mix weight; the other recipe omits the weight.

Duncan Hines-centric

"Soda Pop cake" is succinct, indicating that the baker would also refer to the cake mix box instructions. I'm guessing a little bit of prior cake-making experience is helpful.

Duncan Hines has an association with Ready Set Eat, for which a recipe for soda pop cake finally shows up. And it calls for DH cake! "6 BOX CAKE MIX RECIPES AND HACKS", points to "2 Ingredient Strawberry Lemon-Lime Cake". Significant mixing instruction-""thoroughly combine cake mix and soda". The output is a 9 x 13 single layer, with suggestion of powdered sugar dusting.

Additional Recipes with Nod to Blending Ingredients and Yields

"2 Ingredient Soda Cake - Unreal!" shows the process from start to finish (using whisk), suitable for new bakers. It makes a 9 x 13 sheet cake, subdivided and minimally whip-creamed.

"2 Ingredient Chocolate Coke Cake" prefaces the recipe with some background. Might be useful when a baker is first exploring making such a cake. Scroll down to the details. She suggests using a mixer instead of a whisk. The output is a 9 x 13 sheet cake, undecorated.

"Bill shows us how to make 2 ingredient cupcakes!" demonstrates his recipe. Bill is the host for Toon In with Me cartoon show that airs weekdays. His sidekick is a talking tuna puppet. The demo was a bit amateurish and lacking in some details, but possibly endearing to audience who might think, "Hey, I could do that! He whisked diet orange soda and vanilla cake mix (both room temperature) in a bowl. Some of the batter went into lined cupcake cups. The use of an air fryer is different. Would-be bakers can refer to other soda pop recipes for filling in blanks.

"NO EGG BOX CAKE" is a nicely short video. She uses a spoon for her stirring. The process veers oddly with batter pour into a greased pan that transitions to a drizzled Bundt cake. She commented later "Same Cake, Different Pan."

"Soda Cake Recipe! 2 Ingredients" is over 10 minutes long, but contains caveats to squash cake mix lumps and to not overbeat. Interestingly, her instructions to stir about 30 seconds conflict with Betty Crocker box instructions for one-minute low speed, the 2 minutes on high. BTW, her yield is 12 cupcakes per recipe.

"3 INGREDIENT VEGAN CAKE HACKS | Can I Make A Vegan Cake Using Soda?!" finally shows the soda pop cake recipe starting about 5:12. She uses a tilt-head mixer (maybe KitchenAid). Interestingly, at the batter pour near 6:30, she prepares two 9-inch springform pans. starts out with two pans, At 7:00, she decides to use only one pan. After bake and cool, the frosting goes on only the one layer, even though she plan-b intended to slice the layer and put in a middle layer of frosting.

Calories and Sodium

I’m always curious about the calories and sodium in my cakes and cookies recipes. The soda pop cake stats can seem rather indulgent, but the calories compare favorably against standard box cake recipes that use eggs/egg whites and oil.Using soda pop (140 C) instead of box's ingredient adds of egg whites (51 C) and oil (400 C) saves loads of calories. Even more calorie savings if passing on standard recipe that calls for water, oil (533 C), and eggs (210 C). If using standard box cake recipes and frosting, the total calories bump up ~450 to 750 calories. Noteworthy: Using diet soda instead of sugar soda saves about 10 to 15 calories a slice. Rec: Indulge with the sugary stuff.

Read "Soda Pop Layer Cake--Low-height N Rich, Hmm" for post-recipe afterthoughts and additional soda pop cake musings.


Soda Pop Layer Cake--Low-height N Rich, Yum
Soda Pop Layer Cake--Low-height N Rich, Hmm
Video: Soda Pop Layer Cake--Low-height N Rich

Saturday, October 31, 2015

Simply Simple Pineapple Cupcakes

How about pineapple cake that isn't upside-down cake or coconut-pineapple combo (piña colada-ish)? This recipe uses a standard recipe for yellow cake mix and crushed pineapple. Pineapple juice replaces the water. If you want to try an easy scratch recipe, visit "EZ Pineapple Cupcakes".

My cake recipes are usually for cupcake or mini-cupcake/muffin serving sizes; portions and handling are convenient for groups of people. They also take a lot less time to bake than sheet or round pan cakes. I can't work up enthusiasm for making a pineapple upside-down cake—too much mess and hassle for me, I guess.

I originally planned to try the bundt cake recipe that called for adding pudding, which I referred to in my "EZ Pineapple Cupcakes". This Dole recipe made my eyes glaze over, especially the need for 4 eggs and 3/4 cup of oil.

Fortunately, I spotted a related but more intriguing recipe. Although I want to bake a pina colada-type cake, I'm glad I read enough of the recipe to spot the part about replacing water with pineapple juice.

My pixstrip shows the following image sections:
  1. Initial preparing
    1. Implements
    2. Ingredients
    3. 20-oz can of pineapple (measured for juice and divided fruit). Note: I squeezed the fruit a LOT to obtain the 1 cup of juice I needed.
  2. Mixing
    1. Bowl with eggs, cooking oil, pineapple juice ("wet" ingredients)
    2. Lightly blended "wet" ingredients
    3. Cake mix powder poured onto the blended "wet" ingredients
    4. Mixed
    5. Pineapple poured onto the mixture
    6. Mixed
  3. Baking
    1. Batter in pans
    2. Baked cupcakes
    3. Cupcakes turned over onto cooling racks
    4. Cupcakes in tins (8 cut into halves and in checkerboard placement with the other 16)
Implements
  • mixer
  • medium-large mixing bowl
  • rubber spatula(s)
  • measuring spoon
  • measuring cup(s)
  • spoon and bowls for divided pineapple, measuring cup or jar for juice
  • cupcake pans (Use different size pans if desired, following baking time suggestions on the cake mix box.)
  • cooling rack for baked cupcakes
Ingredients
  • 1 box (16.5 oz) yellow cake mix (I used Duncan Hines Classic Yellow cake mix.)
  • half of well-drained crushed pineapple (6 to 6 1/2 ounces)
  • eggs, number as listed on cake mix box (3)
  • cooking oil, amount as listed on cake mix box (1/3 C)
  • pineapple juice as replacement for the water called for on cake mix box (1 C)
  • spray oil
Instructions (Have the cake mix box handy!)
  1. Preheat the oven (350°).
  2. Prepare baking pans with spray oil. (The box says to use baking cups for cupcakes, but I didn't.)
  3. Lightly blend the eggs, juice, and oil.
  4. Pour the cake mix powder into the bowl of liquids and beat as directed.
  5. Pour the crushed pineapple into the batter and blend.
  6. Distribute the batter into the baking pans. (Cupcake wells will be almost full.)
  7. Bake for time recommended (18-21 min for cupcakes). Test for doneness with toothpick.
  8. Remove the pans of baked cupcakes and place on cooling racks (~15 min).
  9. Place cakes upside down onto the racks. You might need to use a knife to loosen cakes from wells.
  10. When the cakes are totally cooled, you can serve them up (with or without frosting), or pack them up.
The recipe yielded 24 whole cupcakes. I cut 8 in half, then arranged all of them in checkerboard pattern. People can pick half size, full size, or combination cupcakes.
Post-Recipe Thoughts

 White Cake Mix Instead of Yellow Cake Mix
The day after I made the cupcakes with yellow cake, I tried the same recipe with Duncan Hines Classic White cake mix. I used the other half of the crushed pineapple and added 1 cup of canned pineapple juice. I also added 8 drops of yellow food coloring before I folded in the pineapple, but the outcome was still paler than using yellow cake mix. Interestingly, the white cake mix calls for 1/4 cup of oil instead of 1/3 cup for the yellow cake mix. The calorie amounts reflect the difference in oil amount.

The table contrasts calorie amounts for yellow vs. white Duncan Hines cake mixes that I used.
Ingredients yellow white
prepared mix
2750
2400
pineapple
93
93
juice
130
130
total
2983
2623
each cupcake (1/24 cake)
~125
~110

EZ Pineapple Cupcakes vs. Using Boxed Cake Mix
The process for the scratch vs. cake mix pineapple cupcakes mainly differs for mixing methods. Scratch requires gentler batter combining, and cake mix requires more vigor. The scratch results were moister than using cake mix. The calories for scratch is 125 (assuming 2 cups of sugar), same as for yellow cake mix. I skipped frosting the cake mix cupcakes to minimize calories and extra effort. I had also passed on adding extract.

Sunday, July 30, 2023

Soda Pop Layer Cake Followup

In mid-May, I made my first-ever soda pop layer cake, which uses only cake mix and soda pop. Most recipes I'd spotted showed cupcakes or sheet cakes as end results. My layer cake came out rich and tasty, but low height. It tended to be more crumbly than cakes that call for cakes. Nevertheless, it was yummy!

My followup soda pop layer cake is as low-height and delish as the previous one. BTW, a little goes a long way. Despite the low profile because of less cake volume, the flavor is more concentrated. A twelfth serving of the soda pop cake seems as satisfying as a tenth serving of a standard cake mix cake that calls for eggs, oil, and water.

This time around, to lessen time and effort for sifting the cake mix powder and stirring/dispensing the ingredients, I used more efficient implements.

Calories and Sodium

The ingredients are same as the previous cake. The soda pop, despite a different label, is the same.

Using soda pop (140 C) instead of box's ingredient adds of egg whites (51 C) and oil (400 C) saves loads of calories. Even more calorie savings if passing on standard recipe that calls for water, oil (533 C), and eggs (210 C). If using standard box cake recipes and frosting, the total calories bump up ~450 to 750 calories. Noteworthy: Using diet soda instead of sugar soda saves about 10 to 15 calories a slice. Rec: Indulge with the sugary stuff.

Future Followup Soda Pop Cakes?

I might pass on trying my Tupperware sifter for future cake, as the capacity is only one cup. I'd need to reload the gadget maybe up to four times. BTW, I became curious about the cake mix powder texture WRT sugar. Ingredients don't elaborate, but I suspect the sugar is a finer granularity than packaged granulated sugar.

My other consideration for followup soda pop layer cake might be trying the Betty Crocker mixer method of 30 seconds low followed by 2 minutes medium. Rather than doing a video/blog project, I'd add a dated section to this article comparing results for machine mixing vs. whisk stirring.


Soda Pop Layer Cake--Low-height N Rich, Yum
Soda Pop Layer Cake--Low-height N Rich, Hmm
Video: Soda Pop Layer Cake--Low-height N Rich

Soda Pop Layer Cake Followup (article, video)

Tuesday, April 29, 2014

EZ Pineapple Cupcakes

I recently became intrigued at a poked pineapple cake recipe that I saw in a coupon ad. I found the online version, but only after I ran across a no-poke recipe that attracted me for its simplicity.

In the past, I've looked at pineapple upside-down cake recipes, and can't seem to muster the enthusiasm to make one. Holey moley! Both Betty Crocker and Duncan Hines have recipes that, to me, are mind-numbing for numbers of ingredients. As for maraschino cherries inside the pineapple rings, I'll save those ingredients for the ham that I picked up for Easter and still haven't baked yet. (Sell-by date has another 1 1/2 weeks.)

Back to the Dole recipe, I thought the number of ingredients and process looked way more complicated than what I wanted to try. Making a cake with pineapple in it interested me, along with making handy individual smaller sizes instead of using a bundt pan. It took a good while to find the "Pineapple Poke Bundt Cake" recipe on the web. Without Googling the exact title, I was unable to find the exact recipe. Even searching Dole's website didn't yield the recipe.

The upside in expending the effort to find the pineapple poke cake recipe was finding food.com's "Frosted Pineapple Cake". The cake part calls for only five ingredients—flour, sugar, eggs, crushed pineapple, and baking soda. As usual, when I see a recipe, I assess the ingredients and process. As the poke recipe included vanilla bean, I figured the scratch recipe might be ok with adding vanilla extract.

I further deviated from the scratch recipe as follows:
  1. Measured the pineapple juice for curiosity's sake (3/4 cup, the same amount for the poke cake recipe).
  2. Stirred the dry ingredients in a plastic measuring bowl.
  3. Stirred the wet ingredients in a different measuring bowl. (Added 1 teaspoonful of vanilla. As the poke recipe calls for vanilla bean, good enough use vanilla extract in the scratch recipe.)
  4. Stirred the wet ingredients into the plastic bowl.
  5. Noted the batter measurement (5 cups).
  6. Poured the batter into the 24 spray-oiled cupcake pan wells, baking at 350° for about 20 minutes instead of 9 x 13 pan for 40-45 minutes.
  7. Skipped the frosting.
My pixstrip shows eight image areas:
  1. Implements (Your preferences might vary.)
  2. Ingredients
    • Dry, with plastic bowl
    • Wet, with glass bowl, and spray oil
  3. Batter in plastic bowl
  4. Batter in cupcake pans
  5. Baked cupcakes on cooling rack
  6. Baked cupcakes detached from pans and flipped onto cooling rack.
    Note: For extracting the cakes, I used a plastic knife to gently cut around the cakes and nudge at the bottoms.
  7. Baked cupcakes in cake taker.
Ingredients
  • Dry
    • 2 C flour
    • 2 C granulated sugar
    • 2 tsp baking soda
  • Wet
    • 1 20-oz can crushed pineapple, all of it
    • 2 eggs
    • 1 tsp vanilla
  • spray oil (Next time, I might try also shaking some flour into pans after I spray oil and see if the cakes detach a little more easily.)
Instructions
  1. Preheat the oven to 350°.
  2. Pour the dry ingredients into the plastic bowl, using a wire whip. (I used a flat one.)
  3. Mix the wet ingredients in the other bowl.
  4. Pour the mixed wet ingredients into the plastic bowl and stir the ingredients until they're moistened.
  5. Pour and evenly distribute the batter into the 24 spray-oiled cupcake wells. (I pushed my luck by pouring the batter to almost the top instead of the usual 2/3 to 3/4 full.)
  6. Bake for about 18-20 minutes or until the cupcakes are lightly browned. (Use toothpick test for doneness if desired.)
  7. Transfer the baked cupcakes onto cooling rack.
Post-Recipe Thoughts

The recipe makes more of a quick bread than typical cake mix cake. Thus, I used a wire whip to gently but thoroughly mix rather than use a hand mixer and beat the ingredients. The cupcakes' texture seemed denser than regular cupcakes—weighing about 2 ounces each, a little less airy than regular cake, only slightly chewier than a muffin, and not crumbly. The cakes were not crumbly. I put them into cupcake papers for neat handling.

The cupcakes are low fat and low sodium, but extremely high in carbs—lots of sugar, pineapple, and flour. Each is about 125 calories, way less than if you add frosting. Yummy taste and texture; seems like adding frosting would be loading even more sugar and also adding more work.

October 31, 2015 (update)
If you want to use a cake mix method for pineapple cupcakes, visit "Simply Simple Pineapple Cupcakes". An update to ingredients: In researching for that blog article, I saw a scratch-ingredients recipe where 1 1/2 cup of sugar is ok to use. Though 400 calorie savings per batch makes sounds impressive, it translates to only about saving 17 calories per cupcake.

Monday, November 30, 2009

The 99¢ Effect and Other Saver Thoughts

My article started out about pricing with regard to saving, particularly how 99¢ is such a popular price, a price ending, anyway. As I "scribbled" my streams of consciousness—besides 99¢—thoughts also included tenths of cents still anachronistically attached to gasoline per-gallon prices, coupons, before/after price changes indicated in print ads, sales taxes that no advertiser includes, and baked goods pricing.

As the seasonal buying rush is spiking around this time, this might be an appropriate time to discuss the psychology of pricing at 99¢. Dr. Robert Schindler, Professor of Marketing at Rutgers has been cited as an expert about the pricing psychology. A couple of papers specifically address 99 as price endings, which you can find links to at his faculty website. An educational resource that splits the pricing psychology is at Ohio State University Extension "Fact Sheet". The paper discusses use of 99¢ rather than $1, and 49¢ rather than 50¢. As for news, blog articles, and forums regarding 99¢, googling for 99 cents effect will yield lots of results for those mildly curious to those who want to turn in a research paper for a grade. (No, I'm not listing all my sources I ran across. Students need to do their own finding and sifting.)

One topic related to 99¢ that has intrigued me over the years has been the price of gasoline. I'm not attuned to non-US prices, so I'm just talking about stateside per-gallon listings. It's had that pesky decimal point to indicate tenths of a cent per gallon for as long as I can remember—let's say when gas was under 49.9¢ a gallon. Even when it's risen to over $4.00 a gallon, and has receded to currently over two and under three dollars (I know, mushy spread—so my article doesn't risk becoming obsolete overnight), the stations insist on keeping that nine-tenths of a cent price appendage. I say, kill the fraction of a cent pricing and be done with it! Don Boudreaux's blog article from 2006 discusses gasoline pricing in even closer detail than just the nine-tenths cent.

Coupons! With this economy, I sense a lot more people are using them. It can get exhausting sifting through piles, deciding which ones to save, which to use for which trip, how to sort them so they don't expire before getting a chance to use them. Sunny side up—good value coupons for items you use AND go on sale at the same time! Not so sunny—coupons for items you can't find, are the wrong packaging, expire about a week before you remember you had them, and have expiration dates a day before you regularly shop. (And you momentarily didn't extend your mental calendar out far enough.)

One thing that I've always viewed wryly is the newspaper or store trumpeting the aggregate value of coupons in the packet I just received. "Save $90!" "$199.40 coupon savings!" These statements never come with estimated purchase totals if you truly bought all the items required to save as much as they claim. Hmmm, who would buy EVERYTHING in the advertising packet anyway?

Markdowns and markups get such different treatments in print ads. If an item's price goes up, and it's a fresh ad, you never get to view the "before" price. If a hardcopy print ad (or menu) price goes up, there's usually a huuuuuge splotch that obliterates what the former price was. But you know it went up! In contrast, if a print ad shows a price decrease, the older price is visible, with a wimpy, usually horizontal or diagonal strikethrough, then the new price listed nearby. Mustn't miss the potential savings!

What about a menu price decrease? I'm guessing it happens infrequently. If price decreases occur, I think eateries print up new submenus. Maybe they create new dishes with more customer-friendlier prices. Lots of discount coupons have been appearing in the newspaper and mail as well. And more and longer happy hours.

Advertisers seem to almost always ignore state sales taxes as they entice us to spend. The oddest and imho, most dishonest ads I find are the ones that practically declare you can buy an item for the exact price they advertise. The ones that most come to mind are fast food, cars, and services (utilities). Only $49.99 a month! Only $9.99! Only 99¢! Okay, maybe "Only $1!" Right.

Another advertising strategy I find entertaining is the breaking down of price per unit. Something that's only so much per month can get quite expensive when extended out to a year. Say you get cable for $29.99 a month (special deal?). (There's that pesky 99¢-effect pricing again!) Well, in a year, that comes to $359.88 a year. If they advertise it as a per-day cost, it sounds a lot less costly—98.6¢ a day, less than a dollar a day! It's a bit interesting to me that not more companies are pushing daily-cost unit-pricing instead of monthly-cost. Maybe that's coming. Oh, let's also remember about taxes that go on top of the advertised prices.

Speaking of per-unit pricing transitions, remember when cakes and pies sold by the whole units? They still sell them that way, but it seems they've gotten so expensive that the new units are by the slice. In the case of cakes, cupcakes have also become unit pricings. Ahhh, cupcake prices have now approached the price of what whole cakes used to cost. (A way to return to less expensive cakes is to bake and frost your own.)

Sunday, February 14, 2016

Those Two-Tone Confetti Cupcakes

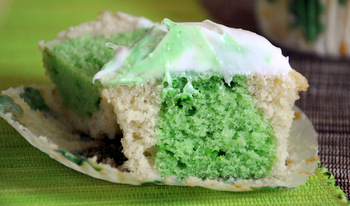
This article is one of my rare ones about food that is more analysis than recipe. Last month, I made Cinnamon Two-Tone Cupcakes with 1/2 box of yellow cake mix, using Wilton two-tone cake inserts. I observed that the interior columns of the cakes were blobby. This time, for the other half box, instead of a cinnamon and nutmeg mix for the interior part, I used 3 tablespoons of rainbow jimmies.

This batch came out worse looking than the cinnamon ones. The interior "columns" seem to have clumped together, some pooling at the bottom. The (confetti) jimmies look smeary after baking. I'm thinking that the combination of moistness and baking temperature partly dissolves those decorations. (A magnified pic in Confetti Cupcake Bites shows the same kind of smeariness.)

Icing

I used 1/2 recipe for simple powdered sugar glaze, omitting the vanilla. I used a fork to stir 1 1/2 tablespoons of water into a container with 1 cup of powdered sugar. With the cupcakes bunched together on the cooling rack atop a baking pan, I poured the glaze onto the cupcakes.

I had set the iced cupcakes in refrigerator for an hour or so, then "sugared" them up as follows:
  1. Poured some red-color sugar on a saucer. (Happy Valentine's Day today!)
  2. Placed each cupcake upside down onto the sugar and rotated the cake to coat its top.
  3. Placed each of the cakes right side up.
Note: The image at the top of the article shows some cupcakes with glaze only and others with glaze and red sugar.

Post-batch Thoughts

 Batter Process
For the time I spent on dispensing the batters into the Wilton inserts and achieving the blobby, bland-looking baked results, I would not make the confetti version again. (If making confetti cupcakes, blend in maybe 5 to 6 tablespoons of jimmies into one batter bowl, foregoing Wilton cupcake inserts.)

The cinnamon two-tone cupcakes, although blobby, show visual contrast and taste really good. The image at page 31 of https://app.box.com/s/r62gd7ax0ctgjcw9os6bih5ic1z12vva shows more details than the image in the cinnamon cupcake article.

 Cake Topping Process
For future cupcake icing projects, I would pour the icing in small, tight circles or dip the tops of the cakes into the icing container. And I'd sugar them immediately instead of waiting till later. Why not coat with frosting?
  • I don't have any canned frosting in the house and don't want to buy any.
  • I have loads of powdered sugar I want to use up but don't want to make frosting using perishables like butter and milk.
  • I want to use up some of the many colored sugars I have in the pantry.

Saturday, November 19, 2016

Zebra Cake, Using Two Half Boxes of Mix


Last month, I wrote up "Zebra Cake, Using Marble Cake Mix", which differs from this zebra cake only slightly. While the marble cake method has the convenience of using one box of cake mix (marble), the two-half-box method provides flexibility in varying flavors and brands. Try different varieties of chocolate (fudgy, devil's food, …) and lighter color cake (white, yellow, vanilla).
My pixstrip shows the following image areas:
  1. ingredients
  2. equipment
  3. preparing pans (spray oil with parchment paper)
  4. separate bowls for chocolate and white cake mixes
  5. mixing of wet ingredients
  6. mixing of white cake batter
  7. mixing of chocolate cake batter
  8. start of dispensing of batters into the pans, alternating colors
  9. batters in pans, kitchen scale
  10. baked cakes
  11. parchment paper removal
  12. frosted cake with slice showing zebra effect
Ingredients
  • 1/2 box chocolatey cake mix (I used Duncan Hines Devil's Food.)
  • 1/2 box lighter color cake mix (I used Duncan Hines Classic White.)
  • 2 egg yolks
  • 3 egg whites
  • 3/8 C cooking oil
  • 1 1/8 C water
  • spray oil
  • frosting of your choice (I used mocha frosting. Scroll down for EZ instructions.)
Implements
  • electric mixer
  • 3 mixing bowls, 1 for mixing wet ingredients, the other two for mixing the batters
  • 2 round cake pans
  • cooling rack(s)
  • measuring cups
  • rubber spatula(s)
  • 2 1/4-cup measuring cups for dispensing different color batters
  • measuring cup or pitcher that holds more than two cups
Additional (straggler) items
  • parchment paper as desired
  • knife for spreading frosting
  • cake plate
Instructions (Have the cake mix box handy! And watch the YouTube video for more details.)
  1. Prepare baking pans. (I used parchment paper and cooking spray.)
  2. Pour the cake powders into separate bowls.
  3. In the third mixing bowl, mix the wet ingredients together, then measure. (Mine measured about 2 cups.)
  4. Pour half of the liquid into the lighter color cake powder, then mix (about 30 seconds on low, then 2 minutes on medium).
  5. Preheat the oven (350°).
  6. Pour the other half of the liquid into the chocolatey cake powder, then mix (about 30 seconds on low, then 2 minutes on medium).
  7. Use the two 1/4 C measuring cups to alternate pouring light and dark batters into the two pans. (Afterward, if desired, weigh the two filled pans to confirm the amounts are close to equal. Adjust as desired.)
  8. Bake for about 24 minutes. YMMV
  9. Test cake(s) for doneness with toothpick.
  10. Remove the pans of cake and place on cooling rack(s) for about 15 minutes for cooling.
  11. Decorate as fancy as you wish. Conventional, not-too-fussy decorating is as follows:
    1. Place one layer upside down on a plate and decorate the exposed side
    2. Place the other layer right side up on the first layer.
    3. Frost the sides.
    4. Frost the top.
Mocha frosting:
o 1/2 can white frosting
o 1/2 can choco frosting
o 2 tsp instant coffee dissolved in 1 tsp just-boiled water or just-brewed coffee

If necessary, microwave the frostings a few seconds for stirrability, then stir all ingredients together.
Post-recipe Thoughts
This two-half-box method for zebra cake yielded only slightly less batter than the marble-cake method, but final cakes looked and tasted similar. (I'm not a pro.) For the marble-cake method, the wet ingredients were 3 eggs, 1 cup water, and 1/3 cup oil; baking time was two minutes shorter. Anyway, for future zebra cakes, I need to improve my aim in pouring batters in concentric circles.

Thursday, January 21, 2016

Cinnamon Two-Tone Cupcakes


Around Thanksgiving, I went to Michael's and spotted an intriguing Wilton gadget for making two-tone cupcakes. The design is for making two-tone cupcakes—"Fill the inner portion of the insert with one flavor or color of batter and the outer ring with another". I bought one that day, and another one a few days later, both times using a 50% off coupon. Grand total came to $7.00 + sales tax.

Before trying out the gadgets, I decided to look up info and recipes. Did I get an eyefull. Lots of complaints!
  • Messy!
  • Time consuming!
  • While pulling up gadgets,
    • Batter stuck to gadgets before falling from gravity, resulting in a gloppy mess. (I'm thinking surface tension because of viscosity.)
    • The batter that stuck to the gadgets would also pull up paper liners.
    • Misalignment of inner ring and outer ring of gadgets resulted in batter seeping from one area to another.
With all those complaints in mind and some commenters' suggestions, I hoped to avoid sorry pitfalls. I made sure to include the following actions in the recipe:
  • Spraying oil into the Wilton gadgets and cupcake pan before pouring the batter in.
  • Omitting paper liners in the pan wells.
  • Initially pouring a small layer "outer" area batter into pan before placing Wilton gadgets. Doing so was intended to prevent breach between contrasting batters.
  • Carefully pouring batters by using small measuring cups that have little spouts. (Some bakers suggested piping the batters, but I consider the step to be extra work and wasting bags.)
Cinnamon seems to be a common flavor for cinnamon rolls, coffee cakes, and some muffins, but not so much for cakes and cupcakes. I did run across recipes for dozen-quantity muffins that called for cinnamon and nutmeg. And the pans were standard 12-well cupcake pans. Thus, my recipe has a not-so-common cake flavor (using 1/2 box of cake mix) and instructions for using Wilton two-tone cupcake inserts.

Video-recording the recipe process was a new experience for me. Generating the YouTube video and subsequent .pdf file were even more adventuresome. A future blog article will be about having used Microsoft Movie Maker, Acoustica (audio editor), and Irfanview (graphics editor) WRT to the video and secondary files.

As has been my tradition with recipes, I include a pixstrip, this one showing the following image areas:
  1. Implements
  2. Ingredients
  3. Spray oil with pan and Wilton gadgets
  4. Mixed cake batter, with cinnamon and nutmeg beside it
  5. Blending of cinnamon and nutmeg into the smaller bowl batter
  6. Dispensing of batters into the pan with Wilton gadgets(combo image)
  7. Removal of Wilton gadgets before placing the pan in oven
  8. Baked cupcakes
  9. Iced and some sliced-open cupcakes
Implements
  • Electric mixer
  • Mixing bowls
  • Measuring cups
  • Measuring spoons
  • Rubber spatula(s)
  • Cupcake pan
  • Wilton cupcake insert (I used two.)
  • Cooling rack
  • Butter knife or similar for removing cupcakes from pan
Ingredients
  • 1/2 box cake mix—white, yellow, vanilla to contrast with cinnamon/nutmeg
  • ingredients for half-box recipe, using the box info for guide
    • eggs
    • cooking oil
    • water
  • 1 teaspoon cinnamon
  • 1/2 teaspoon nutmeg
  • spray oil
  • icing or some other cupcake topping (I used a freebie Wilton decorating icing. I've provided links to alternative toppings at the bottom of the article.)
Instructions (Have the cake mix box handy!)
  1. Preheat the oven (350°).
  2. Prepare baking pan and Wilton gadget(s) with spray oil.
  3. Weigh 1/2 box of cake mix powder, and prepare the batter as instructed on the box.
  4. Pour 1/3 of the batter into a smaller bowl, and blend the cinnamon and nutmeg in. (Initially, I tapped and mixed a little of the cinnamon and nutmeg into the batter before divvying it into two portions.)
  5. Pour a small layer of "outer" batter into each cupcake well.
  6. Place gadget(s) into wells and dispense inner batter, then outer batter. Lift gadget(s) and place into wells needing filling. Repeat this step until finished.
  7. Remove the gadget(s). Place rack in oven and bake for about 18 minutes. YMMV
  8. Test cupcakes for doneness with toothpick.
  9. Remove the pan of baked cupcakes and place on cooling rack. Run a knife along the edges for loosening them.
  10. Decorate as desired.
Post-recipe Thoughts
Despite my oil-spraying of my cupcake pan and the Wilton inserts, the center cupcake columns looked blobby, and seemed more voluminous than the "outer" cupcake parts. I was surprised that they more resembled the globby one at Baking Bites than other nice and straight ones.

The next time I make two-tone cupcakes, I'll spray more oil, and I'll try using rainbow jimmies for the center columns. (2/19/2016—Baked a batch. Read "Those Two-Tone Confetti Cupcakes" for my results assessment.)

Nutrition: The cake mix box states 260 calories (prepared) for each serving, 10 servings a box. So, the cupcakes are about 110 calories each, plus an additional ~40 for the sorta light smear of Wilton icing. (Sigh, I miss the recent olden days when cake mix weighed 18.25 ounces and served 12 instead of the current 15.25 ounces for 10 servings. Grrr! Reduction by ~16%, jeopardizing *FORMERLY RELIABLE* results and yields.)

Alternates to cupcake toppings (viewed by me for possible future use), in two cases, part of main sweets recipes:

Friday, March 25, 2016

EZ Colorful Cupcake Topping


Bake your favorite cupcakes, then top with icing and colored sugars, rainbow jimmies, or nonpareils, or a combination. "Gluing" colored sugars onto glaze-topped cupcakes results in festive-looking snacks that have less topping than those with swirly, buttercream mounds of frosting.

The pixstrip shows the following image areas:
  1. Cupcakes, topping ingredients, implements
  2. Glaze items
    1. Ingredients and implements
    2. Vanilla poured into pan with water in it
    3. Powdered sugar mixed into pan (3 successive images)
  3. Glazing and sugaring process
    1. Applying glaze to cupcake (I applied glaze with spoon instead of dipping cupcake top because of the cake crumbliness.)
    2. Moving color sugar-coated cupcake to rack
    3. Placing done cupcake onto pan
  4. Topped cupcakes on plate
Implements (for Topping the Cupcakes)
  • Cup for powdered sugar
  • Measuring spoons
  • Small, shallow pan for mixing the glaze
  • Fork for mixing glaze ingredients
  • Shallow bowls or saucers for colored sugars (I used 6" paper plates that I folded for pouring sugars back into their jars.)
  • Pan or rack for cupcakes
  • Spoon for distributing glaze on cupcakes if necessary (Fetched when the dip-cupcake-into-glaze attempt worked poorly.)
Ingredients
  • Cupcakes
    12 baked cupcakes (I used half recipe of yellow cake mix and blended in 3 tablespoons of rainbow jimmies.
  • Glaze ingredients (I used 1/2 recipe for simple powdered sugar glaze.)
    • 1 C powdered sugar
    • 1 1/2 tbsp water
    • 1/4 tsp vanilla
  • Colorful sugars (suggestions as follows)
    • Colored sugars
    • Rainbow jimmies
    • Nonpareils (I skipped.)
    • Other
Note: The amount of glaze is for 12 cupcakes (a half-box recipe for standard cake mix powder, which contains approximately 15 or 16ish ounces.) Double the amount of glaze ingredients if you plan to decorate 24 cupcakes.

Instructions
  • Bake or obtain a dozen cupcakes. (Suggestion: For more colorfulness, fold in 3 tablespoons of rainbow jimmies into the batter.) After baking, remove the cupcakes onto a cooling rack.
  • Make the glaze. (I used a fork to stir the water and 1vanilla into a shallow pan, then stirred in the powdered sugar.)
  • Dip tops of cupcakes onto the glaze, lightly dip them onto sugars, and set them rightside up onto the rack.
Post-recipe Thoughts
I will never, ever again use the Duncan Hines Classic Butter Golden cake mix. With my first half-box batch, I filled 12 oil-sprayed cupcake wells as I normally do. The baked cakes had encroached the top of the pan, resulting in "muffintop" looks. They were difficult to extract from the pan. Many partially crumbled.

With the second half-box batch, I sprayed oil more generously, and poured the batter over 16 wells. After baking, the cakes looked like they hardly rose. Moreover, they were also difficult to extract. The prominent fail part was trying to hold a cake in preparation to dipping it into the glaze. It was as fragile as a cornbread muffin, making it necessary to improvise and smear the glaze. In any case, the results were pretty ugly.

FWIW, the recipe calls for soft butter instead of oil, and less than half of the usual amount of water. The beating instructions required 30 seconds for initial blending, like "normal" cake instructions. However, it required 4 minutes of medium beating instead of the "normal" 2 minutes on high. The batter was very thick, and messy to distribute.

Visit my YouTube video to see more details of this recipe's process.

Related Articles

Saturday, August 20, 2016

Duncan Hines Perfect Size Cake--Off Golden Path


Duncan Hines debuted its Perfect Size cake line about a year ago. The ingredients make a smallish single-layer cake. The kit includes cake mix powder, a 6" paper pan with detachable liner, and frosting powder. The five flavors:
The Duncan Hines Perfect Size product I tried was “Golden Fudge”—the “Golden” referring to the cake itself, and “Fudge” referring to the accompanying frosting. "Chocolate Lovers" name, and to some degree, "Strawberries and Creme" seem pretty implicit of cake and frosting flavors also. The other two flavor names seem marketingish, but their accompanying images and very short descriptors provide info for expected results.

I decided to try out the recipe, even though the cake result is less than half an actual fully frosted cake but nearly the same cost ($2.78, fortunately, offset by 55¢ off coupon). The instructions seemed more bothersome than what I’d normally tolerate. I figured by the time I finished the project, I might deviate anyway, and I could get an article, video, or both out of the effort.

The main off-golden-path part of cake is the frosting—having used ready-to-spread white frosting instead of following instructions of the included frosting packet. (The frosting pack requires mixing the powder with water and butter.) An example video of the frosting hassle is at "Duncan Hines Perfect Size Cake Review", starting at 5:55 and stopping at 10:27.

My other deviation was using oil with the cake mix instead of butter. "Fat chance: Is Butter Really Better?" indicates that subbing oil for butter is fine, if not better, than using butter for the fat. I tend to favor mixing oil with water and egg together as a wet-ingredient mixture, then mixing the powder in.

The baking temperature was 300°, and for 34-39 minutes. My cake required 34 minutes—good thing I went for the minimum time. Looking at full-size cake mix boxes, most times are shorter and baking at 350°.

View my video of my Duncan Hines Personal Cake experience. If you want to try making one of these cakes, beware of some caveats. To Duncan Hines' credit, the websites I cited at the top of the article for their Personal Size cakes include comments from customers and their 1-to-5 star ratings. The most common complaints:
  • Costly for such a small cake result.
  • Too much time required for baking.
  • Labor-intensive for making frosting with included powder. Would be much more appealing for an envelope of ready-to-spread frosting.
  • Terrible-tasting frosting results from using powder and required additional ingredients.
  • Leaky paper baking pan and liner during baking, spilling batter onto the oven. (Oy!)
My recommendations: Buy a full-size box of cake mix and full container of ready-to-spread frosting. It'll be less preparation hassle, more flexibility for cake and frosting flavors, and better economy. The only real convenience to the Perfect Size is a throwaway paper baking pan.

If you want to make a smaller size cake, divvy up half a box of cake mix, follow the instructions on the box, adding only half the added ingredients. Pour the batter into one prepared (wax paper or whatever) round cake pan and bake as instructed. After cooling, frost with 1/2 container of ready-to-spread frosting of your choice.

Sunday, July 31, 2022

Pt 2 Pineapple Coconut Cake, Closer Cake Prep Looks


During the planning and execution of my pineapple an coconut cake (article, video), I thought of closer looks at some parts of processes. They pertain to combo-flavor cakes using two kinds of cake mixes, preparing cake bans before pouring in batter, and squeezing more out of can frosting.

Weighing and divvying up two cake mix flavors for combination flavor

To combine two flavors, the packages need weighing first. During the pouring of each package separately into a bowl with strainer, the strainer is handy for sifting. (One reason I wanted to perform this task was to see if either of the powder included flavor bits, such as dehydrated pineapple or coconut.) Nope.

Using parchment paper and spray oil to line cake pans before pouring the batter for baking

A very traditional method for prepping pans for baking is greasing the pans, then sprinkling and tapping flour to coat it. The cake mix boxes lately seem to advocate using spray oil, and ignoring the sides. My method is using spray oil and parchment paper, spraying bare pan, then pressing paper, then spraying again. The baked cakes come out cleanly and leave nearly no residue on the pans. Makes for easy wipe and clean.

Using mixer to increase canned frosting volume and spreadability

I'd used mostly can frosting (16 ounces) for a long time. Occasionally, I do buttercream (powder sugar, butter, milk), which takes a lot more effort. It seems that one pound is skimpy, and I need to spread thinly. I thought about the "whipped" frosting that comes in a much taller can. Taller can seems to mean more frosting, right? Also, I have run across comments on the web that it's very spreadable. I'll take the leap someday. Not too wild about the weight being actually only 14 ounces.

I also ran across info that you can whip can frosting and get more volume. I tried it once before, but didn't think to do volume measurement before and after, but did notice difference. This time, I did before and after comparison, noting the frosting ended about 3/8" from the rim. After whipping, I refilled the can. The frosting reached the rim, for ~12% increase. This session might have been more fun and yielded more if I had not refrigerated the can for a few hours before the whipping. In any case, I noticed improved spreadability.


"Pt 1 Pineapple Coconut Cake, Using Half Box of Each Flavor"

"Pt 2 Pineapple Coconut Cake, Closer Cake Prep Looks"

View more cake recipes.


Wednesday, March 20, 2013

Waits N Measures, Baking Pans N Papers

I'm big on baking. I bake frequently enough to know what I'm doing, but still need to consult with recipes online and in books for quantities, capacities, and baking times and temperatures. I use cake mixes frequently for cooky recipes. I fiddle around with modifying basic cake mix recipes. Sometimes I change up ingredients. Sometimes I use different pans than the recipes call for.

I've included a table for using different baking pan cavities—square mini-cupcakes, mini-cupcakes, regulation-size cupcakes, and mini-loaves. For measuring capacity, I pulled out the pans and poured amounts of water into a well of each pan. The table has wait (bake) times and measures. Dimensions, capacities, and baking times are approximate. (I did mention in Lemon Poppyseed Mini-cupcakes recipe that mini-cupcake baking time is about 25% less than for regular cupcakes.)

Shape Dims (") Capacity Wells
/Pan
#min@
325-375°
square
silicone
1 1/2 x 1 1/2
x 5/8 dp
1 1/3 T
(4 tsp)
24 15-16
mini-
cupcake
1 3/4 U dia
x 1 1/4 L dia
x 5/8 dp
Less than
2 T
12 13-17
whoopie 3 dia
x 1/2 dp
4T 12 15-16
standard cupcake 2 3/4 U dia
x 2 L dia
x 1 1/16 dp
5T 12 15 to 20,
22 to 27
mini-loaf 3 5/8 x 2 3/8
x 1 1/8 dp
8 T
(1/2 C)
9 TBD
3 teaspoons (t) per tablespoon (T), 16 T per cup (C),
77 fluid drops per teaspoon

Caution: Recipes say to fill the wells about 2/3 to 3/4 full. Remember to differentiate advised-fill from capacity. If you fill the wells to capacity, the batter will expand during baking and spill over, making a BIG mess!
Actually, I still need to test for wait time for mini-loaves. I bought that pan several years ago, but I have yet to try using it. Visit Cake Mix Doctor and Duncan Hines topic links.

I recently acquired a couple of whoopie pans. I used one of them and one of my silicone pans for experimenting with a muffin recipe that calls for cake mix. The cake mix powder itself was a modification—half Red Velvet (Duncan Hines) and half strawberry (coincidentally, but not significantly, Pillsbury). More on the recipe in an upcoming article.

If using a cake mix powder, the box usually seems to specify baking times for 2 round layers, regular cupcakes (24), and a 9 x 13 sheet. In my experience, the mini-cupcakes yield tends to be about 2 1/2 as many—60. My Lemon Lemon Poppyseed Mini-cupcakes recipe yielded 77 units. (I'm positive that adding 2 T poppyseeds didn't contribute to raising the yield past 60.) In trying out the square mini-cupcakes, the yield would have been 24. More on that Red Velvet and strawberry cupcake experiment in an upcoming article.

For those who bake, the table is handy for planning the number of small-size baked items (assuming using an 18 1/4 oz. box of cake mix), the amount of batter to pour in, and how long to bake them. I am disappointed to say that, out of the three national brands of cake mix, only Duncan Hines mix has 18 1/4 ounces of powder for the normal 2-layer or 9 x 13 sheet cakes. The other two brands contain 15 1/4 ounces.

In my Internet travels, cupcakes and muffins, particularly small ones, cause confusion because of their similarities. Cupcakes are small cakes. You beat the batter. The cupcakes tend to have frosting. Muffins are quick breads, and the batter is best stirred gently. Muffins tend to have crumbs or icing drizzle. "Cupcakes Vs. Muffins: An Epic Battle and Some Big Questions" is an extensive article about their differences.

Standard paper liners seem to be mini-cupcake or standard cupcake sizes. Want to be cost-effective? For starters, don't pay extra for fancy colors or designs. The list has some quantities and prices to consider. (If the price was $[something].99), I rounded it up.
  • Michael’s (undiscounted—40% coupon available online)
    • 100 sm/$2 (~2 cents each)
    • 350 sm/$4 (~1 cent each)
    • 75 standard/$2 (~3 cents each)
    • 18 short crown 2 ½ dia/$2 (~ 5.5 cents each) Yow!
  • Make It Sweet (in Austin)
    • 100 sm/$2 (~2 cents each)
    • 500 sm/$6 (~1.2 cents each)
    • 75 standard/$2 (~3 cents each)
    • 500 standard/$9 (~ 1.8 cents each)
Looking for an alternative to short crown papers? Get large muffin papers and trim to size. Watch Todd Wilbur obtain shorter paper liners (at about the 1:41 mark) for making his peanut butter cup clones. Sure, he uses standard cupcake liners, but you get the idea.

Another Todd Wilbur video shows how avoid buying a Twinkie-shape pans for his Twinkie clone recipe by wrapping aluminum foil pieces around a spice jar. Move your pointer to about the :56 mark.

Saturday, March 30, 2013

Square Mini and Whoopie Muffin Experiment


Previously in my Waits N Measures, Baking Pans N Papers article, I mentioned my experiment of using a whoopie pan and a silicone pan that has square wells. I had cake mix powder left from Valentine cake mix cookies for trying this experiment.

I'd not yet tried using cake mix for making muffins. Well, why not try? Use up my half batch of Red Velvet and strawberry cake mix powders. Try a cake-mix-to-muffin recipe. Try a couple of different pan shapes and establish baking times and temperatures. As for pan choices, I had two thoughts:

Square mini-shapes could be cute, especially if the batter flowed over the rim just enough like muffins should. The recipe that came with my whoopie pan made my eyes glaze over—too much information, too many ingredients, too many steps. Soooo, how about using whoopie wells for making Seinfeldian muffin tops? (Take a trip down memory lane about the muffin top episode.)

The Duncan Hines Cake Mix Muffin recipe that I used provides additional recipe suggestions. (I almost always modify recipes that I try.) My only deviation for this one is the cake mix flavor(s), baking pan shapes, and baking time.
My pixstrip shows seven image areas:
  1. Implements
  2. Dry ingredients (flour, cake mix, baking powder)
  3. Wet ingredients (eggs, oil, milk)
  4. Silicone pan and whoopie pan with paper liners
  5. Batter in the pans, not all wells filled, unused liners removed
  6. Baked square (20) and whoopie (2) muffins
  7. Closer look at 8 square muffins and the two whoopie muffins (Seinfeld-esque muffin tops)
In my experiment, I used 1/4 box each of Red Velvet and strawberry cake mixes for making a half batch of muffins. You can use a whole box of any flavor. The ingredients I list make a whole batch, which can yield 48 square mini-muffins or 24 muffin tops. If you try round mini-cupcake pans, the yield number will be similar to using square silicone pans, but the tops might not billow over the edge as much.

Note: Yield can depend on the cake mix weight and recipe that you use and how full you fill the wells.
Implements
  • large mixing bowl
  • medium small mixing bowl
  • mini square silicone pans
  • mini-cupcake paper liners
  • whoopie pans
  • regular cupcake paper liners
  • pastry blender
  • measuring cups
  • measuring spoons
  • additional spoon for ladling batter if desired
  • rubber spatula(s)
  • cooling rack for done muffins
As part of the pre-preparation, I shaped some regular cupcake liners for the whoopie muffins and mini-cupcake liners for the square minis. For each whoopie liner, I pressed a liner between a peanut butter jar lid or similar size lid and a whoopie well. For the top- and bottom-row square wells, I preshaped each liner by pressing a square cookie cutter into liners that I put inside the wells. For the middle rows, I simply inserted and finger-pressed the liners. (After I dropped the batter in, I removed the liners that I didn't use.)
Ingredients
  • Dry
    • 1 box cake mix
    • 2 T flour
    • 1 t baking powder
  • Wet
    • 3 eggs
    • 2/3 C milk
    • 1/3 C oil
Instructions
  1. Preheat the oven to 375 degrees.
  2. Place paper liners into cavities.
  3. Pour the dry ingredients into a large mixing bowl, using the pastry blender to blend well.
  4. In the smaller bowl, mix the wet ingredients.
  5. Pour the mixed wet ingredients into the larger bowl and stir the ingredients until they're moistened.
  6. Scoop about a rounded tablespoon spoonful of batter into each paper-lined square well or two rounded tablespoonfuls for whoopie pan wells
  7. Bake for about 16 minutes or until the muffins are lightly browned. (Use toothpick test for doneness if desired.) I initially baked for 8 minutes, checked, and baked another 8 minutes. I thought it was nice that both muffin shapes baked in the same amount of time.
  8. Transfer the baked muffins onto cooling rack.
It's nice to be able to use cake mix for baking muffins. The number of ingredients are not much more than baking cakes or cupcakes. The density is only slightly more than cake. In the future, if using mini-cupcake silicone pans, mini-cupcake liners easily fit and work fine. One huge difference between using a mini square silicone pan vs. a mini-cupcake pan—24 wells vs. 12, respectively. With the silicone pan, I put a cooky sheet underneath for supporting the floppiness and in case the batter dripped over. Maybe I'll skip the cooky sheet the next time.

If you don't have silicon pans and want to read up on advantages and disadvantages, two sites you can visit are Silicone Vs. Metal Bakeware and Silicone vs metal for shaped pans.

In my Waits N Measures article, I note that whoopie well capacity is 4 tablespoons (12/pan) and regular cupcake well capacity is 5 tablespoons (12/pan). Enough volume similarity to think of whoopie shapes as flat and wide cupcakes or muffins (muffin tops!).

Thinking that I'm more likely to use the whoopie pan more for baking muffin tops than whoopie cookie halves that the pans are originally for. The whoopie pan might be a really good way to bake muffin tops and not wind up with stems like the ones Elaine couldn't get rid of. :-)