I've been blogging since September 2009. I'd started out with text
content, later adding images. Over the last few years, I've accompanied
articles with slide shows and videos that I've posted to YouTube.
Sweets seem to have piqued me, particularly from early to mid 2010s.
This year has re-piqued me. In inventorying my recipe blogs, i came up
with 28 cooky recipes and 19 cake and cake-ish recipes. In the
cake-centric video, I list my blog catalog number with the article title
and finished-item image (newest at top).
In musing about sweets, I'd noticed similarities and differences in
topic choice and execution over the years. (For cakes, I started out
mostly blogging about cupcakes and occasional mini-muffins.)
Morselly Cakes to Whole Cakes
Amusingly, my interest in cake recipes and documenting them have
evolved from earlier times. Early on, most of my cakey topics have been
articles with thumbnailish images. I did a few cake items a few years
ago, with video. I recently got more involved with making whole cakes
and videos for them. I seldom narrate videos anymore.
Some Cake Prep Changes Over Time
My cake pan preparation is now neater. And, after having had my
tilt-head mixer, I finally decided to use it for cake batter mixing. The
metal bowl's handles make pouring easier than using both hands on a
glass mixing bowl.
One recent acquisition I've appreciated is my digital scale. It has
five clickable units of measure and reads out to two decimal places.
Zeroing out containers is a breeze, and weight readouts are more
accurate than my old Braun scale.
I've been blogging since September 2009. I'd started out with text
content, later adding images. Over the last few years, I've accompanied
articles with slide shows and videos that I've posted to YouTube.
Sweets seem to have piqued me, particularly from early to mid 2010s.
This year has re-piqued me. In inventorying my recipe blogs, i came up
with 28 cooky recipes and 19 cake and cake-ish recipes. In the
cooky-centric video, I list my blog catalog number with the article
title and finished-item image (newest at top).
In musing about sweets, I'd noticed similarities and differences in
topic choice and execution over the years. (For cookies, I varied baking
cake mix cookies but also baked scratch cookies.)
Dough Mixing
In the beginning, I used pastry blenders for mixing. More recently,
I've used a tilt-head mixer for mixing to save on elbow grease. Never
going back to pastry blender. BTW, oatmeal cooky dough is the hardest to
manually mix, imho.
Dough Dolloping
In the distant past, I used a cooky press or measuring spoon and
spatula. More recently, I used a 1 1/3 T cooky scoop, which is a bit
more convenient than spoon/spatula. Downside of either method is
one-at-a-time dispensing, which also requires travel time and effort
between dough bowl and pan.
Even more recently, I've tried making some disks and funnel shapes to
use my cooky press. I still have more experiments. Using a cooky press
saves on dough travel between dough bowl and pan.
In one of my recipes, I shaped the dough into a rough rectangle, then
used a metal spatula to cut it into squarish shapes. It was easier than
one-at-a-time dolloping.
Problem Dough
I've wrestled with dough that's stiff, sticky, or both. Dolloping
wasn't much fun. My mind's been percolating with thoughts of spray oil
and my "slice solutions brownie pan".
The pan and compartments remind me of an ice tray. I considered buying one, but they seem pricey.
OK, Not Baked Cookies
I included some fudge recipes. Although not oven-baked goods, they're
sweet items anyway. I felt they were more cooky than cake because of
handling handiness. Yum!
What kind of "cherry flavored pieces" would be in the cake mix?
Cherry flavor without cherries? The list of ingredients didn't assure me
of treasure. Wanting to increase cherry visibility, I added drained,
pitless, stemless maraschino cherries that I chop-pulsed in my blender.
The cake mix cooky dough was unexpectedly sticky and difficult to
handle. And the baked ones from the first batch didn't lift off the pan
as easily as most other cake mix cookies in the past. Furthermore, they
came out soft, rather than crunchy like the Mon Cheri cookies. But what
yummy taste and sweetness!
Seeing the "cherry flavor pieces" that are in Betty Crocker Super
Moist Cherry Chip Cake Mix, which I used for making the cake mix cookies
Using a blender to chop maraschino cherries, then draining and weighing them before they go in the cooky dough.
Using four ways to dispense the cooky dough. Two of the ways include
using a cooky press to push out such add-in-ingredients dough. (View
guidance on DIY nozzle and disk modification.)
My video
walks the viewer through the cooky recipe, from ingredients, equipment,
mixing, dispensing, and baking. The dispensing is notable for showing
four ways, two using a cooky press, one using a cooky scoop, and one
using a spatula and measuring spoon.
Cherry Flavored Pieces
An text item on the cake mix caught my eye "with cherry flavored
pieces". Thus, I wondered what they could be. I sifted the cake mix. The
remains (a smidge more than 1/3 ounce) resembled pink nonpareils and
maybe soy bits. The list of ingredients didn't mention soy. Thus, I
Wondered if BC was fudging terminology, such as "corn cereal". Something
seemed clearly non water-soluble.
Very Sticky Dough
Weirdly, the dough behaved differently than numerous past cake mix
cooky doughs. It came out very sticky and difficult to handle. I needed
help using fingers, butter knife edge, and spoon to drop dollops. I
noticed the dough weirdness even before adding the cherries and almonds.
Baked Cookies Hugging Pan
Another oddity about the dough was its tendency to stick to the pan
for the first batch. Past cake mix cooky dough, besides dispensing
easily, seemed to have enough fat for the baked cookies to easily lift
off the pan. For the second batch, I spray-oiled the pan before
dolloping. Easier cookies liftoff!
Cooky Results and Looking to Make 2.0 Version
The home cookies were softer, chewier, sweeter, and stickier to the touch. Yield was 44. (Mon Cheri cookies come 18 to the box.)
Future attempts will include adding one two two tablespoons of flour
after mixing in the cake mix powder. I might or might not adjust the
fat. Maybe add more fat to see if the
dough is easier to dispense, and the cookies easier to lift off the pan.
Plan B is to spray oil the pan anyway. Plan C is to try making cherry
almond cookies using a different cake mix.
To address the sticky-to-touch baked cookies, lowering the
temperature to 325 and adding more baking time should tend to make them
dryer and crunchier. Hoping for perfection the next time.
Calories and Sodium
The calories and sodium amounts are similar to those numerous cake
mix cookies I've made. Because of the difficulty in dispensing,
individual cooky sizes and stats might vary.
Closer Looks
Visit "Pt 2 Cherry Almond Cake Mix Cooky, Closer Looks" (article, video) for following details:
Seeing the "cherry flavor pieces" that are in Betty Crocker Super
Moist Cherry Chip Cake Mix, which I used for making the cake mix cookies
Using a blender to chop maraschino cherries, then draining and weighing them before they go in the cooky dough
Using four ways to dispense the cooky dough. Two of the ways include
using a cooky press to push out such add-in-ingredients dough.
During the planning and execution of my pineapple an coconut cake (article, video),
I thought of closer looks at some parts of processes. They pertain to
combo-flavor cakes using two kinds of cake mixes, preparing cake bans
before pouring in batter, and squeezing more out of can frosting.
Weighing and divvying up two cake mix flavors for combination flavor
To combine two flavors, the packages need weighing first. During the
pouring of each package separately into a bowl with strainer, the
strainer is handy for sifting. (One reason I wanted to perform this task
was to see if either of the powder included flavor bits, such as
dehydrated pineapple or coconut.) Nope.
Using parchment paper and spray oil to line cake pans before pouring the batter for baking
A very traditional method for prepping pans for baking is greasing
the pans, then sprinkling and tapping flour to coat it. The cake mix
boxes lately seem to advocate using spray oil, and ignoring the sides.
My method is using spray oil and parchment paper, spraying bare pan,
then pressing paper, then spraying again. The baked cakes come out
cleanly and leave nearly no residue on the pans. Makes for easy wipe and
clean.
Using mixer to increase canned frosting volume and spreadability
I'd used mostly can frosting (16 ounces) for a long time.
Occasionally, I do buttercream (powder sugar, butter, milk), which takes
a lot more effort. It seems that one pound is skimpy, and I need to
spread thinly. I thought about the "whipped" frosting that comes in a much taller can.
Taller can seems to mean more frosting, right? Also, I have run across
comments on the web that it's very spreadable. I'll take the leap
someday. Not too wild about the weight being actually only 14 ounces.
I also ran across info that you can whip can frosting and get more
volume. I tried it once before, but didn't think to do volume
measurement before and after, but did notice difference. This time, I
did before and after comparison, noting the frosting ended about 3/8"
from the rim. After whipping, I refilled the can. The frosting reached
the rim, for ~12% increase. This session might have been more fun and
yielded more if I had not refrigerated the can for a few hours before
the whipping. In any case, I noticed improved spreadability.
I'd deviated from various cake mix instructions now and then. This
time, I decided to try making a hybrid cake of two flavors—pineapple and
coconut. (Duncan Hines makes both flavors.) Get info for ingredients,
equipment, and procedures for all the stages to make this delish pina-colada-ish cake. View also "Pt 2 Pineapple Coconut Cake, Closer Cake Prep Looks", the supplemental video.
Boxes in hand, I found commonality for fluid and fat. With research
and thoughts of "Do no harm", I came up with a suitable list of
ingredients.
The pineapple mix box calls for 1 cup water, 3 eggs, and 1/2 cup oil.
The coconut mix box calls for 1 cup milk, 4 eggs, and 1/2 cup unsalted
melted butter. An anomalous ingredient for the coconut cake is two cups
of coconut on the finished cake, top and sides.
In making my hybrid cake, my final decision on instruction
ingredients was 1 cup milk, 4 eggs, and 1/2 cup oil. As for the coconut,
I thought the amount excessive, and cleanup troublesome. I decided to
fold 1/2 cup shredded coconut into the batter just before pouring it all
into the prepared baking pans.
Fluid thoughts
I had toyed with the idea of using all or half pineapple juice and
half milk. I used nonfat milk coz it's what we use. (Whatever convenient
fat-content milk should be fine.)
Egg quantity
I researched about using three or four eggs, and numerous sources
advocated the extra egg as helpful, certainly not harmful for results.
It helps prevent cake crumbliness. I'm guessing an extra egg also adds
richness and extra nutrition.
Fat type
I melt butter for popcorn, but seldom for any other reason. I decided
that using oil is slightly less hassle for cake making. Also, oil costs
about 1/3 as much as butter. Another fat type to consider could be
shortening, which I haven't used in many years. Out of sight, out of
mind. I gave a brief thought to applesauce subbing. Nah!
Calories and Sodium
This calorie and sodium section differs from similar table-form
sections that I've created in most other blog articles WRT baked items.
Notable are coconut and frosting, which list servings in grams instead
of ounces. Whole grams instead of decimal grams or fractional ounces
tend to result in rounded off ("squishy") numbers.
Calories info
Ref: both boxes 15.25 oz. Calories: pineapple mix only, 170/serving; coconut mix only, 170/serving
cake mix, 2 half boxes total -> 1700 C
4 eggs, 70 cal each -> 280 C
milk, nonfat, 80 C/cup -> 80 C
oil, 1984 C/cup -> 992 C
coconut, 1/2 C packed, aka 42g (70C/15g, thus 2.8 svgs) -> 196 C
frosting, 16 oz, aka 453g (140C/33g, thus 13.73 svgs) -> 1922 C
I looked on the web for a means to push out chocolate chip dough. I
spotted some presses that included piping nozzles in addition to dough
disks. Amazon displayed a few such devices, the magic find word being "biscuit", which British commonly refer to stateside "cookies" Another site is Ebay. Weirdly, seems many US companies sell cooky presses and icing decorator guns separately.
I actually own Wilton Dessert Decorator Pro Stainless Steel Cake Decorating Tool
So far, I tried it once, thinking I could pipe nice angel food
cakelets. Big fail, as the oven temperature totally collapsed the edges.
Interesting discovery: the screw-on collar fits my Wilton cooky press.
Some day I'll try the decorator collar with my press and see about
squeeze-triggering chocolate chip cooky dough.
In the cooky dough dispensing stage (squeeze trigger, pinch dollop,
deposit), I decided to skip on trying the soda bottle funnel. I favored
the other two because the diameters were bigger, and the distances from
dough tube to spout were shorter.
Mini and Regular Chocolate Chips
For thIs recipe, I've used most of the same type dough. I varied on
using mini chocolate chips for one batch, and regular chocolate chips
for the other. Notice side-by-side contrast for size and quantity
between them.
"How Many Chocolate Chips in a Cup? (standard, mini, jumbo, & chunks)"
contrasts quantities of chocolate chips per cup portions depending on
the size of the chips. Minis are much smaller than regulars—"About 6½
mini semi-sweet chocolate chips equal 1 morsel-sized chocolate chip."
"How to Measure Chocolate Chips Correctly (2022)"
further states: "Chocolate chips are measured by weight, volume, or
count. The most accurate way to measure chocolate chips is to weigh them
on a kitchen scale."
A related link is "How Many Chocolate Chips in a Tablespoon? (Depends on chip size)"
provides details about factors that affect counts, including molds,
ingredient variations and chocolate type. The table lists "1 Tablespoon
(14 grams)". My mini chips bag (Nestle) lists one serving as 1 T (14 g),
70 calories. My regular chip bag (Hill Country Fare) lists one serving
as 1 T (15 g), 70 calories.
The article shows a table for chips per tablespoon (14 grams). The
minis count is 135, and the regular chips (standard) count is 28. Thus, a
mini weighs a smidge more than .1 gram, and a standard weighs .5 gram.
More Chocolate Chip Nibbles
"0.1-3g Chocolate Chips Making Machine Fully Automatic"
looks to be a marketing site that describes a chip-making machine's
capabilities, with spec overviews. I'm thinking the machine is likely
able to make chips as small as minis. FWIW, I never see fractions or
tolerances for grams in nutrition tables.
"How are Chocolate Chips Made in a Factory? 4 Steps"
summarizes the chip-making process that starts with melting the
ingredients together and ending with creating the morsels. Both sites
have the same embedded YT video of the machine in action.
"COOKIES PLANT"
starts showing dispensing (extruding) pieces onto trays starting about
1:25 (6 rows). Note some nozzles rotate to form some cooky types. About
3:10, the shows wire-cut drop cookies.
The calorie counts were problematic for this recipe primarily because of
stats for chocolate chips. Nutrition tables for my bags of mini
chocolate chips and regular chocolate chips stated calories per
tablespoon. One brand stated a tablespoon as 15 grams, and another brand
stated a tablespoon as 14 grams. Formulation can affect stats. Imho,
gram weights and small serving sizes for items as teeny as chocolate
chips can leave lots of room for inaccuracies.
The stats in the Calories and Sodium section in "Pt 1 Cooky Pressing
Choco Chip Cooky Dough, Not One-at-a-Time Dolloping" is theoretical. I
don't really know how much tolerance is in gram weights per tablespoon.
Another big factor in stats "slop" is the size of my cookies. They're
not factory-made exact; some are undersized, some oversized. All were
yummy!
Cooky press users, use your press to pump out chocolate chip dough by
using a DIY funnel made from the top of a food bottle. Dough scoopers
and other one-at-a-time dollopers, you can reduce the tedium and
repetitive travel between dough bowl and pan. Squeeze the press trigger,
pinch/deposit dollop, move to another spot on pan, repeat.
Rec: Use cake mix cooky dough for ease and doability. View the video for the recipe start to finish and guidance for making and using your own funnels.
At the end of April, I published "Low-effort Choco Chip Cake Mix Cookies",
my go-to cooky dough recipe using cake mix, oil, eggs, and chocolate
chips. The actual base dough is without chips, and suitable for using a
cooky press.
For thIs recipe, I've replicated most of the dough. I varied on using
mini chocolate chips for one batch, and regular chocolate chips for the
other. Notice side-by-side contrast for size and quantity between them.
The main process difference from my previous cake mix cooky dough
recipe is dispensing, using a cooky press and funnels made from tops of
food bottles. Each DIY funnel shape has a larger end that fits between a
cooky press dough tube and screw-on collar, with the narrow end aimed
toward the pan.
Cooky Press, in Case You Don't Have One But Might Consider One
Typical cooky presses come with stenciled disks (often seasonal
themes) for fast, consistent-size dough dispensing. Chocolate chips are
no-gos because they're oversized for the stencil openings. BTW, cooky
press mechanisms tend not to be strong enough for oatmeal cooky doughs
or similarly thick doughs.
Seems many cooky presses resemble each other for looks and functions. I myself have "wilton preferred press cookie press", but don't remember when I got it. Some disks look different than ones I have.
Two articles with images/videos that show my use of cooky press:
This recipe's numbers are very similar to the ones in "Low-effort Choco Chip Cake Mix Cookies". The yield for that recipe was 40 (from using a scoop and icing spatula for dolloping).
This recipe using DIY funnels for dispensing yielded 55 cookies, 28
in the first half batch, and 27 in the second half batch. The caloric
totals deviated from the previous recipe because, this time, I adopted
nutrition table info from the chocolate chip package.
Actually, another wrinkle is having obtained 28 cookies in the mini
chips batch and 27 in the regular chips batch. If I'd been smarter about
the eventual dolloping, I would have eked out one more dollop for the
latter batch.
Dividing the dough for 2 batches:
Calories = 2715/2 = 1357 C for each half batch
Sodium = 3020/2 = 1510 mg for each half batch
Mini chocolate chip cookie yield: 28
Calories: 1357 + 567 = 1924 divided by 28 cookies = 69C/cooky
Sodium: 1510mg/28 cookies = 54mg/cooky
For the regular chocolate chip cookies, if I had squeezed out 28
instead of 27, calculations would have been easier. In any case, the
numbers would have been 67C and 54mg sodium.
The newer recipe effort is less labor intensive than in 2012. Back
then, I used a manual pastry blender, and
measuring-tablespoon-and-rubber-spatula method to dispense the dollops.
This time, I used a tilt-head mixer, helpful for saving on elbow grease,
and a cooky scoop for dispensing most of the dollops. Also, I weighed
the doughs with a newly acquired Ozeri digital scale,
Tilt-head Mixer
I bought a Cuisineart tilt-head mixer in 2016. It took some getting used
to, but am sure glad I have it. (No longer inclined to use dough/pastry blender to mix dough.) It seems that KitchenAid and Cuisineart get a lot of consumer attention.
Digital Kitchen Scale
For many years, I've used a Braun kitchen scale,
several times daily. I started wondering what other scales were out
there. A few years ago, I had given a couple of relatives digital scales
that had nice features. Glad I poked around the web! Newer ones are
plentiful, and surprisingly inexpensive. The Ozeri digital scale
I have is great for precision and ease of use. The Braun is now
relegated to non-food weighs. Hard to believe the search finds for Braun
kitchen scales for prices.
Cooky Dough Dispensing Using Scoops
"Cookie Scoop Sizes" and "Uses for Cookie Scoops"
inform for flexibility in using scoops for various cooky sizes, and for
more uses than just cookies. These sites' info don't totally coincide
with each other. For instance, my cooky scoop holds 4 teaspoons dough;
the bowl diameter measures 1 3/8" diameter.
"Uses for Cookie Scoops"
indicates that #60 scoop's volume is 1 tablespoon and bowl diameter is 1
3/8", and #50 scoop volume is 4 tsp and bowl diameter is 1 5/8". OTOH, "Uses for Cookie Scoops"
doesn't list #50 size, but lists #60 cookie scoop as holding 1
tablespoon and one teaspoon of dough, and the bowl diameter as 1 3/8".
I had long thought of my scoop as holding 1 1/2 T. One day I did a
test with mashed potatoes. Golly! The scoop level-filled one tablespoon
and one teaspoon! I can't get too excited. The difference of 1/2
teaspoon I can chalk up to imperfect leveling.
Additional Cooky Dough Dispensing Thoughts
Even with a reasonably convenient way to dispense dough with a scoop,
by the time I got to the oatmeal chocolate chip dough, I didn't look
forward to scooping more dense dough. I flattened this batch, then cut
it gently with a icing spatula. I shaped a few scraps together into scoopable dollops.
I mused a possible better way to cut for future dense cooky batches. I then recalled I had bought a device that resembled an ice tray.
The plan would be to spray oil into the pan's parts, flatten the
dough into the pan, and press the divider into the dough. I could then
separate the rectangular shapes from the pan and distribute them into
cooky pan. Not sure I'd try baking an entire batch without considering
dough amounts and baking times.
Anomalous Brown Sugar
I have had the same container of dark brown sugar for what seems like
several years. I think it's made its appearance in several blog article,
particularly in the method of resoftening. I think I have it down now.
For that matter, when I started this oatmeal recipe, I became
apprehensive that I didn't have enough on hand. The "brick" weighed 9.3
ounces. My recipe needed 1 1/3 cups.
After I did the brown sugar resoftening process (microwave "brick"
with water till crumbly), I was surprised I had leftover sugar after I
packed the needed amount. The "Convert Cups of Sugar to Ounces" calculator showed that if I had been short, it wouldn't have been by much!
I have something of a love-hate relationship with brown sugar. Baked
stuff does seem to taste better with it than with white sugar. And I
have run across info that says brown sugar helps make for soft cookies.
Yum! However, I hate that it gets bricky!
Maybe mylar food bags can help keep the brown sugar soft, but I'm not
sure I'd buy in quantity like I see for sale. (I thought about mylar
bags because my Ozeri scale came with a couple of small,
wierdly-new-to-me bags, which I researched, discovering they seem hugely available.)
Almost 10 years ago, I blogged "Simplest Scratch Oatmeal Cookies".
At that time, I included a few images, not having learned to make
movies yet. My methodology was simpler but more labor intensive.
Back then, I used a manual pastry blender, and
measuring-tablespoon-and-rubber-spatula method to dispense the dollops.
This time, I used a tilt-head mixer, helpful for saving on elbow grease,
and a cooky scoop for dispensing most of the dollops. (For the
chocolate chip batch, I took a shortcut, flattening the dough, then
dividing it with an icing spatula for most of the dollops.)
This oatmeal cooky recipe uses the minimal amount of ingredients, for
those who want a nekkid cooky that has lots of oatmeal. The ingredients
are simple—oatmeal, flour, baking soda, oil, eggs, and brown sugar. As a
bonus, I include information for resoftening a brown sugar brick into
its spoonable form.
Because I like chocolate chips in many of my cookies, I split the
dough into two parts, plain oatmeal in one batch, and addition of four
ounces of chocolate chips in the other batch. Tasty results, somewhat
delicate. The yield was 25 for each batch. (Deviating from only
scooping when dolloping the chocolate chip batch probably affected the
number of cookies.)
Chocolate chips in 25 cookies: ¾ C (4 oz) contains 806 C/Cup for 604
among 25 cookies, so, 24 additional calories each chocochip oatmeal
cooky. 88 + 24 → 112 C. No sodium.
Bottom line: Oatmeal-only cookies, 88 C each; oatmeal chocochip cookies, 112 C each
View the video
for detailed info and process to bake the two kinds of oatmeal cookies.
The process shown is not real-time, but you can see visual changes to
the ingredients over time—mainly the dough increasingly dense. So glad
to have my Cuisineart tilt-head mixer!
Note: Oops, I forgot to mention the oven temperature. Preheat oven
350, maybe near the end of dough mixing time(s). Baking time is about 10
minutes per batch.
How low effort are these cookies? Only four ingredients, for
starters. The cake mix itself conveniently includes the flour, sugar,
and leavening. (I prefer yellow cake mix because of the psychological
color of eggs and butter, but other mixes also work.) You mix eggs and
oil together, mix in the powder, and fold in the chips. Dispense, bake,
cool.
The video shows still images and clips for the steps. Note: The
cookies are doable using a pastry blender, but a tilt-head mixer cuts
down on elbow grease.
One instruction I've seen in many cooky recipes is chilling the
dough, from an hour to a few days. Fuggetaboutit for my recipe! Another
skippable item is parchment paper. Cake mix cookies have never stuck to
my baking pans, except once when I tried using a Trader Joe's cake mix.
One other item I took a leap of faith in skipping--pressing the dough
dollops flat, sometimes using fingers, other times using a glass.
Without extra help, the dollops (using 1 1/2 T cooky scoop, level fill)
expanded and spread during baking, but not too wide.
Dough Dispensing
A cooky scoop works same as a spring-release ice cream scoop, but
faster than tablespoon-and-spatula method of scoop cough with one hand
and push with spatula using the other hand.
After I had baked the cookies, I searched on the web for fast dollop dispensing. "The fastest way to scoop drop cookies"
showed me that I've been really pokey. When she used two spoons, she
dispensed 15 cookies in 1:34. When she used a 1-teaspoon cooky scoop,
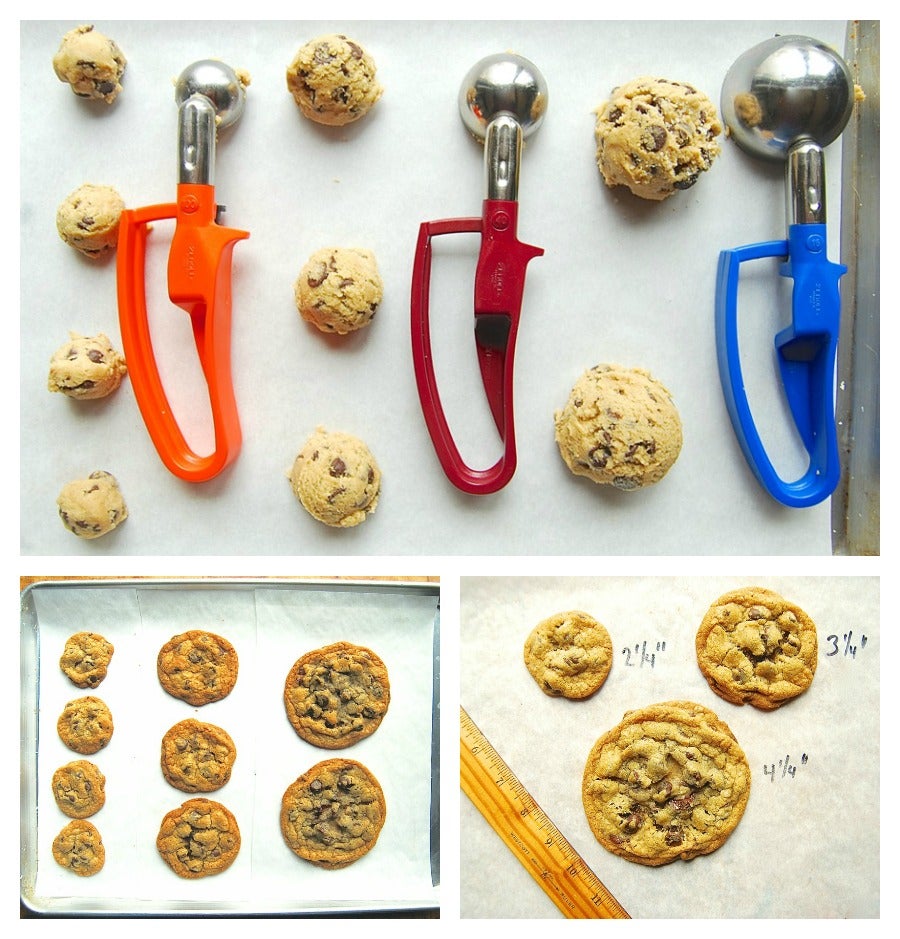
she dispensed 15 in 54 seconds. BTW, she shows her 1-teaspoon baked
cooky as a 2 1/4" wide. My baked cookies were about as wide, but taller,
I think. YMMV.
My smoothing dough against a spatula to flatten the dough before
dispensing was slow. Method 1 (using side of bowl for flattening dough)
in "How to Scoop Cookie Dough"
shows a more streamlined method. Method 2 is much slower with 2nd hand
handling. Useful info is seeing that the dough handler uses food gloves,
which seems to help keep fingers dough-free.
The yield was 40 cookies. Tasty, soft, chewy! I wondered why they
were perfect for softness and chewiness, compared to some of my other
chocolate chip cooky variations. The web listed several results WRT
chewy cookies. One suggested ingredient was cornstarch. Not much, but
enough to affect dough. "From What Does Cornstarch Do in Cookies? (Plus Simple Substitutes to Use in a Pinch)":
Cornstarch isn’t used as a thickening agent in cookies, but
it does have a very important purpose. When a recipe calls for
cornstarch, it’s basically going to be there to help provide structure.
... Certain types of cookies are meant to be very chewy, and cornstarch
is a common ingredient in those.
The cake mix box did list cornstarch. I also recall a trend awhile
back of cake mix companies touting the addition of pudding mix. A main
ingredient of pudding is cornstarch. Another ingredient some sites list
for chewy cookies is brown sugar. The box did not list that. Thus, I
infer that the cornstarch contributed to the texture.
I've long wanted to make a granola variety chocolate chip cookies using H-E-B Select Ingredients Triple Chocolate Granola.
That cereal is yummy, and cookies sound like a handy way to skip the
bowl of milk. Not a milk-and-cookies type myself, maybe others might
take a shine to the idea. Poking around the web, one prospective recipe
was "Granola Cereal Cookies".
The list of ingredients looked reasonably short and simple. Some
comments looked like good suggestions for deviation, such as using
granulated sugar instead of brown sugar, and oil instead of butter. I'm
more partial to granulated sugar; easy to pour. As for oil for fat,
butter is twice to triple the cost of oil for similar quantity. (Butter
seems to be the most common fat for cooky recipes.)
I further deviated by reducing the sugar. I figure the cereal already
has plenty of it. As the cereal is already a finished product, I also
skipped the vanilla and additional chocolate chips. The video is a slide
show for baking these chocolatey chippy granola cookies. The process is
intended for those who have cooky preparation experience. You should
know about recipe utensils and equipment, ingredients, recipe steps, and
reading between lines. Note: The cookies are doable using a pastry
blender, but a tilt-head mixer cuts down on elbow grease.
Dough Dispensing
I used a 1 1/2T cooky scoop. The first panful took 7 minutes, the
subsequent cookies much longer. A few dollops tended to fall apart upon
dispensing--not enough dough to act as "glue". Or too much cereal for
dough amount. Adjustment for future batches would be to lessen the amount of cereal by maybe 3/4 C.
Baking and Results
The yield was 39 cookies. They were tasty, but crunchier than I
preferred. Also, small pieces tended to crumble off upon chompdown. A
main reason for crunchiness is baking at higher temperature and longer
than necessary. Cookies continue to bake with residual heat from the
goodies and also the pan. I baked at 375 for 11 minutes each batch.
Google search results for "why are my cookies hard when they cool" provide insight. I'm leaning more towards temperature and time being the reasons for my outcome. Adjustment for future batches would be to set the oven for 350, and bake between 9 1/2 to 10 minutes.
Calories and Sodium
I was mildly surprised to see the cookies calculated for 139 calories
each. I chalk that high number to the granola cereal already loaded
with calories. Also, dispensing might have been easier if I had more
dough base or less cereal. Maybe I could have squeezed out a few more
cookies for the session for the same total calories.
I've made numerous batches of cookies over years. Want to see more?
My emphases in "Pt 1 Overhead Wraparound Tunic from 60" x 24" Fleece Piece"
were fleece and the making of my tunic. This article provides
additional resources about the material. I also include resources
regarding my initially intended project—poncho or cape.
Maybe my approach should have been to research those garments BEFORE I
bought the fleece. Ponchos and capes seem easy to make; however, they
require huge amounts of fabric, unlike the more compact tunic that I
wound up with.
Fleece Resources
"This Fleece is not that fleece ? Then What is Fleece?"
describes the fabric and features. The site explains uses and
differences in types, depending on material origin. Nearer the end of
article, the do's and don'ts are good advice, many reiterating tips in
other sites I've cited.
"Working With Fleece" includes close-in images and provides advice for novices and experienced stitchers:
Always use a good quality, general purpose thread such as
Gutermann Sew-All and a universal / standard point needle, size: 90/14.
... Fleece does not fray too easily, so neatening seams is not
essential, but you can neaten with a regular or three step zigzag
stitch, if required. ... However, you may find because of the stretchy
nature of fleece, that the fabric edge will curl and wave. ...
"12 Tips for Sewing With Fleece" provides information for fleece and working with it. The following tips differ from non-fleece material:
Stay stitching
Sewing two edges together and keeping the seam flat, accompanied by pictures
Stitch length of 3 (.12) to 5 (.2) Millimeter, IOW, range of 5 to 6 threads to the inch
Reducing machine tension
The tips look most useful for more complicated clothing than a simple cape (one seam); I skipped the new-needle advice.
"16 Tips for Sewing with Fleece" is similar to the 12-tip site, with additional tips and more explanation. Good for reiterating bits of advice.
"Sew/Serge A Professional Looking Fleece Blanket in 45 Minutes"
caught my eye for fleece use and possible project. The techniques are
more advanced and the sewing machine more complicate than I have. It
does provide good info about sewing two pieces that have rounded
corners, then clipping. The finished edge looks really nice!
Capes, Ponchos, Cloaks, Oh My!
I was able to find resources contrasting cape/poncho and cape/cloak.
It's possible that ponchos and cloaks differ enough that they might not
pop up in consciousness at the same time.
So, what's the difference between cape and poncho? Circle
vs. square. The cape has a circular shape and tends to have an opening
in front, while the poncho is shaped like a square with a hole in the
middle.
"What’s the Difference between Capes and Cloaks?"
has a wealth of historical context about capes and cloaks, including
several still pictures (many from movies). The commonality is that "both
capes and cloaks are made of a single piece of fabric that hangs loose
and doesn’t include sleeves."
Capes are typically shorter, falling to the hips or thighs.
Some superhero capes are the exception to the length rule — modern
versions of Superman’s cape nearly touch the ground. Capes also don’t
have hoods most of the time and they don’t necessarily close in the
front. ... Cloaks, on the other hand, fall to below to the knees and are
often floor length. ... Cloak comes from the French word “cloche,”
meaning “bell.” Thus, cloak and “cloche” suggest a wrap narrower at the
top and flaring out at the bottom.
To use the word cloak correctly, use it for full-length or calf-length
outer garments. Nearly all have a clasp, broach, button, or tie at the
neck, many are hooded, and some have arm slits to allow for better
movement. ... Capes are a smaller, generally shorter garment and may
only cover the wearers back. They don’t have sleeves and rarely have
hoods. They are more of an accessory than a source of cover or warmth.
Fleece Ponchos and Capes
A poncho or cape initially looked to be the simplest project for my
60" x 24" fleece piece. I eventually decided my fabric size was more
suitable for creating my overhead wraparound tunic instead, In any case,
the following resources present simplicity in fleece usage.
"How to Make a Fleece Poncho"
shows simple instructions. Appeal of this video: Explicit info about
material sizes, no need to hem edges, simple instructions for joining
the cowl/hood and main piece. Downside: lots of fabric required, ~ 3
square yards.
"How to Sew a Fleece Poncho – DIY Poncho Tutorial"
shows the poncho shape and methodology almost identical to the above YT
video info. Biggest difference is size—60 x 54 instead. Concurrence of
no need to hem—"Because fleece does not fray, there is no need to finish
edges."
The site also includes good info about preparation for joining the neckline to cowl.
Measure one side of the neckline 1/2 inch in from the edge,
then double that number to get the full neckline length. Make sure that
your cowl piece is this wide plus one inch and 22 inches tall. Also make
sure that width is enough to fit over your head!
"DIY Fleece Poncho/Cape | Manifest Destiny"
shows a project more ambitious than I'd want to try, such as hood and
liner, pockets with liners and flaps. Most of the implementation is
thorough. It shows a different way to cut a neckline than at right-angle
apex as some other videos show. It has good details about neckline
stitching to hood and scarf. I also appreciated the info on sewing
pocket hems, snipping at curves (stitches not so straight). Her fleece
color choice, similar to mine, might have contributed to my patience to
view the entire video.
"How to Make a Cape"
shows images and instructions for various capes. The information seems
to be less about fleece, judging from seams and edge-finish usages. The
basic cape is a circle with a head-sized hole in the middle and one slit
from the edge to the hole. Additional instructions and images are for
superhero and fairy tale capes.
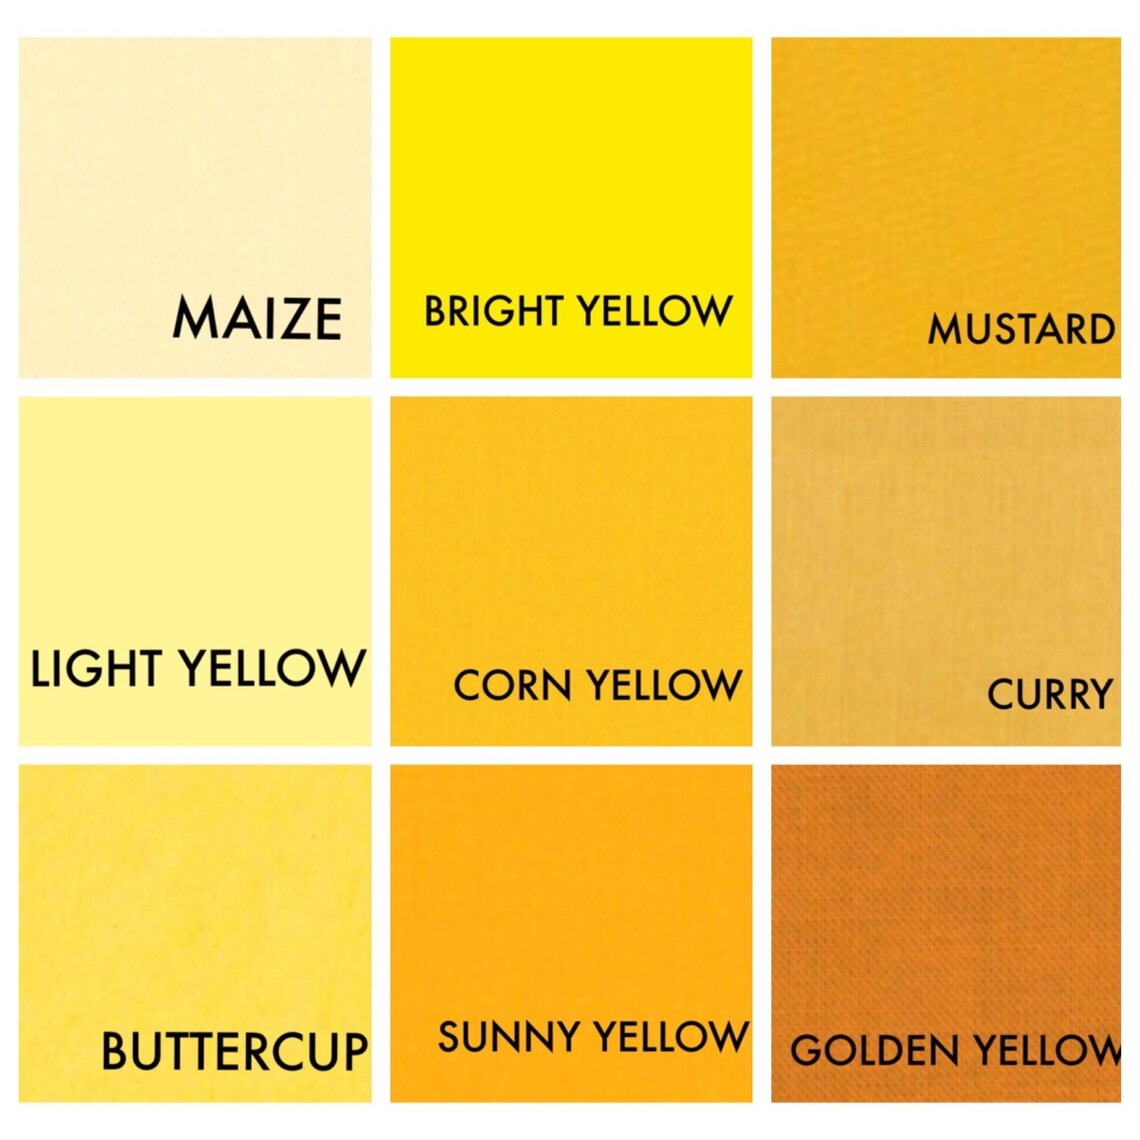
Awhile ago, I bought a mustard yellow
fleece piece that measured 24" (2/3 yard), 60" wide. I wanted to create
something to go with a yellowy big-weave poncho and knit hat I've had
for a long time. Although I initially considered making it a cape or
poncho, the result is my "overhead wraparound tunic".
The laid-out item (front to back) measures about 30" x 45", having
cut the piece in two and rotating them for stitching together. The video
shows still images for the steps. It also shows how to put it on and
use the ties to attach.
My tunic, besides minimizing waste material, required few seams. I
staystitched the neckline and also sewed a flat cord (some remnant wide
twill tape, I think) to reinforce it. I don't remember when or why I
bought the tape, or its original length. Etsy displays reasonable examples. Long story short, I experimented with modeling cut, orientation, and fastening locations and methods.
During the project, it occurred to me that lightweight material is
usable for a cooler-weather tunic. I actually have some lightweight
patterned material from a long time ago that I could measure out for a
summery version tunic. If I were to create it, I'd prefer a longer
length.
I traveled a circuitous route, with lots of decisions in moving from
intending to make a cape/poncho to overhead wraparound tunic. BTW, I
later read that my fleece pre-treatment was not necessary, which "How to Sew with Fleece, Useful Sewing Information for a Beginner" addresses in the "Should I pre-wash the fleece?" section.
Tunic, Not Poncho, Cape, or Cloak
After completing my project, I hunted for garments that it might
resemble. Most images tended to show open-front overlap garments with
ties. Two garments that loosely resemble my result are Siggi BRIGIT iluteenindaja kimono and a beautician tunic. A vintage McCall's apron/tunic paper pattern
incorporates an over-head design, with rounded corners at the hems. The
open sides with ties contrast with my wraparound fastenings.
Why did I consider my result to be a tunic? QA at Google results for "what makes a tunic a tunic" provides some reasonable explanations:
"usually simple in style, reaching from the shoulders to a length somewhere between the hips and the knees"
"loose-fitting shirt that looks sort of like a long shirt or a short dress"
"loose-fitting upper garment that is longer than a shirt"
My batch of chocolate oatmeal cookies using unsweetened applesauce
instead of butter or oil was tasty, but turned out to be a
time-consuming adventure. The less-than-pleasant experiences were dough
stickiness and difficulty of trying to use a cooky press. (For
recipe-centric info, read "Pt 1 Choco Oatmeal Cookies Using Applesauce Not Butter or Oil".)
My recipe at "Simplest Scratch Oatmeal Cookies",
from July 2012 is indeed easy. This time, I wanted to try adding
chocolate chips and also reduce fat calories by replacing oil with
unsweetened applesauce. "How to Substitute Applesauce for Butter in Oatmeal Cookies" includes reasonable suggestions for the ingredients and process. The list of subs looked good.
Cookies that work well with an applesauce-for-butter substitution
include chocolate chip, oatmeal and peanut butter, as long as you don't
mind the cake-like texture. Applesauce would not work well in cookies
that depend on butter for both flavor and crispiness, such as butter
cookies or shortbread.
As in my previous recipe, I needed to soften a brick of brown sugar
(this time, dark). I used the seventh bulleted suggestion from "10 Ways To Soften Hard Brown Sugar".
Need it soft now? Put it in a container and set in the
microwave with a small bowl full of water beside it. Microwave for about
1 minute–check. If it’s still hard, try for another 30 seconds. You can
keep doing this until it’s soft, but watch that you don’t melt it.
This time, I used a couple of two-minute heating times. After packing
a cup of the sugar, I returned the remainder to its bag and fridge.
(I'm guessing that by the next time I need brown sugar, I'll need to
again resoften it.)
So, how'd my cookies turn out? I'd say B+. Reasonably tasty, chewiness similar to cereal bars.
Why not an A? One reason the dough was difficult to dispense—sticky,
sticky sticky! The other reason for not an A was that my easiest
oatmeal-cooky results looked nicer. Although the previous batch didn't
have chocolate chips, I had anticipated this batch would look just as
nice. Dang, wasn't so!
Dough Stickiness
Most of the sites that address dough stickiness talk about the amount
of fat in the recipe, too little flour, and needing to cool the dough.
Seems several pieces of advice pertain to roll-out dough. (Mine were
drop kind of cookies.) As my recipe used applesauce instead of butter or
oil, reasonable advice seems to be to lightly wet dough or try other
means of dispensing dough.
You can handle the sticky dough with wet hands more easily.
Keep in mind that you will need to wet your hands repeatedly until you
are finished working with the dough to prevent it from sticking to your
hands. ... However, don’t do this for too long, as this water will
transfer to the dough and make it wetter and therefore stickier.
If you’re working with a sticky cookie dough and struggling
to get it in the oven, don’t try and get it on the tray with your hands.
... Instead, use a spoon or ice cream scoop or cookie scoop
(recommended) to get the dough onto the baking tray. ... This is great
for doughs that are okay to be a bit more sticky and don’t need to be
rolled out or cut-out.
Initially, I tried my cooky press. I gave that up within three
dollops, as the dough stuck in the chamber all three times, which I
needed to coax out with a spoon. I switched to using my 1 1/2 T cooky
scoop. That worked, but slowly, as dough kept sticking to the scoop's
exterior. The spring squeezer was a bit clunky to eject the dollops
fast.
I've used the spatula-and-tablespoon method in the past for other
cookies. It is a slow method because the dollops, besides, being one a
time, requires two-hand scoop/unscoop.
The next batch, I'll try my adjustable measuring spoon. In any case,
I'll keep a bowl of water and towel nearby in attempts to prevent dough
superstickiness.
Oatmeal for Thought—Quick Oats, Non-quick Oats, ...
Google results for "can i substitute quick oats for old fashioned" show loads of info for contrasting oats and also includes q/a, whether you're curious, or readying to bake with oats.
"Oatmeal Cookies"
advocates quick oats—"tend to make the cookie softer. ,,, it’s what I
always have in my house. Instant oatmeal also cooks faster (even in
cookie form)".
If using too much oat flour, baked goods may turn out dense,
heavy and flat because the lack of gluten prevents the flour from
trapping gases that give rise to the dough or batter.
"One-Bowl, No-Mixer, No-Chill Oatmeal Cookies"
sounds promising for ease. The list of ingredients and instructions look
handy for novice bakers. She advises against using quick oats, that
they "have a much different texture than rolled oats and would act more
like a flour in these cookies. Your homemade oatmeal cookies would wind
up being too dry."
My profession had been technical writer/editor. Through TheWriteJob clublet (blog at http://thewritejob.blogspot.com), I have been exploring my inner creative writing, which includes mostly language enlightenment, entertainment, and a-muse-meant. Over time, I have become more active with images and my YouTube channel.