Around winter holiday season, chocolate-covered cherries tend to float into my consciousness. Another chocolate and cherry concoction has also been staring at me recently when I open the freezer: ice cream with cherries and chocolate chips "H-E-B Select Ingredients Creamy Creations Cherry & Chocolate Limited Edition Ice Cream". One yummy I wanted to buy so I could add chocolate chips and make cookies with is a cherry-chip cake mix. Unfortunately, have heard the supply is spotty "Betty Crocker Super Moist Cherry Chip Cake Mix".
The basic cooky recipe uses cake mix, eggs, and oil. For flavor and color enhancements, I added a package of Cherry Kool-Aid and 10 drops of red food coloring. Another cooky variation is a chocolatey covered one. BTW, I used Black Cherry Kool-Aid for my "Kool-Aided Cake", an experiment. It turned out so well that I rationalized that Kool-Aided cookies could turn out well. View the video for full details of preparing one, two, or three types of cherry-themed cookies.
While thinking about implementation, I decided that chocolate in a form or two would be interesting. My recent foray into chocolate coating and also chips with mint themes inspired me to borrow from those ideas. The intention, besides making tasty cookies, was to improve on similar processes. Additional ingredients for this combo-batch cooky recipe are red food coloring, chocolate chips, and optionally, white chocolate "bark".
Because of the nature of dough stiffness, I recommend using a tilt-head mixer. If you use a pastry blender, wire whip, or hand mixer, stamina would be helpful. Another helpful item is a cooky press for shaping and dispensing cooky dough pieces. Or you can use a tablespoon-and-spatula method.
Cooky Press Thoughts—Disks
I misplaced my Wilton cooky press container, which showed the baked cooky shapes for each disk. The images for the following models look mostly similar.
- "Preferred Press Cookie Press, 13-Piece"
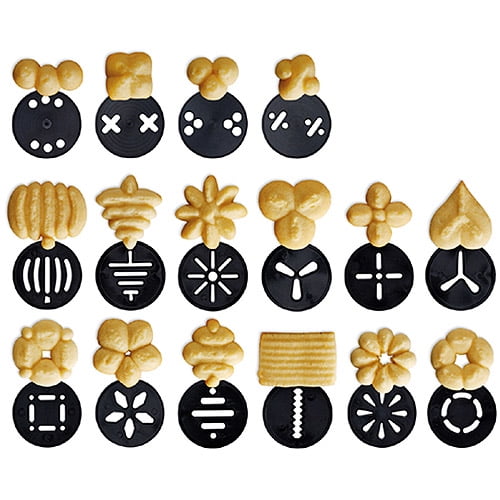
- "Wilton Cookie Pro Ultra II Deluxe Cookie Press". View the useful image of the disks.
- "Wilton Cookie Pro Ultra II With 3 Bonus Disks. (20)"
Cooky Press Thoughts—Dispenser Trigger Squeezes
Using 1 1/2 trigger squeezes of the cooky press yields suitable size cookies.
For the cookies for "Scent o' mintal Journey, Part 4, Choco Unadorned/Coated Minty Cookies", I used two trigger squeezes per cooky. I think the heavier cooky made chocolatey dipping more awkward and used a lot more coating. The yield was fewer than I liked. I'll use 1 1/2 trigger squeezes when using a cooky press.
